
Definition of Visual Search
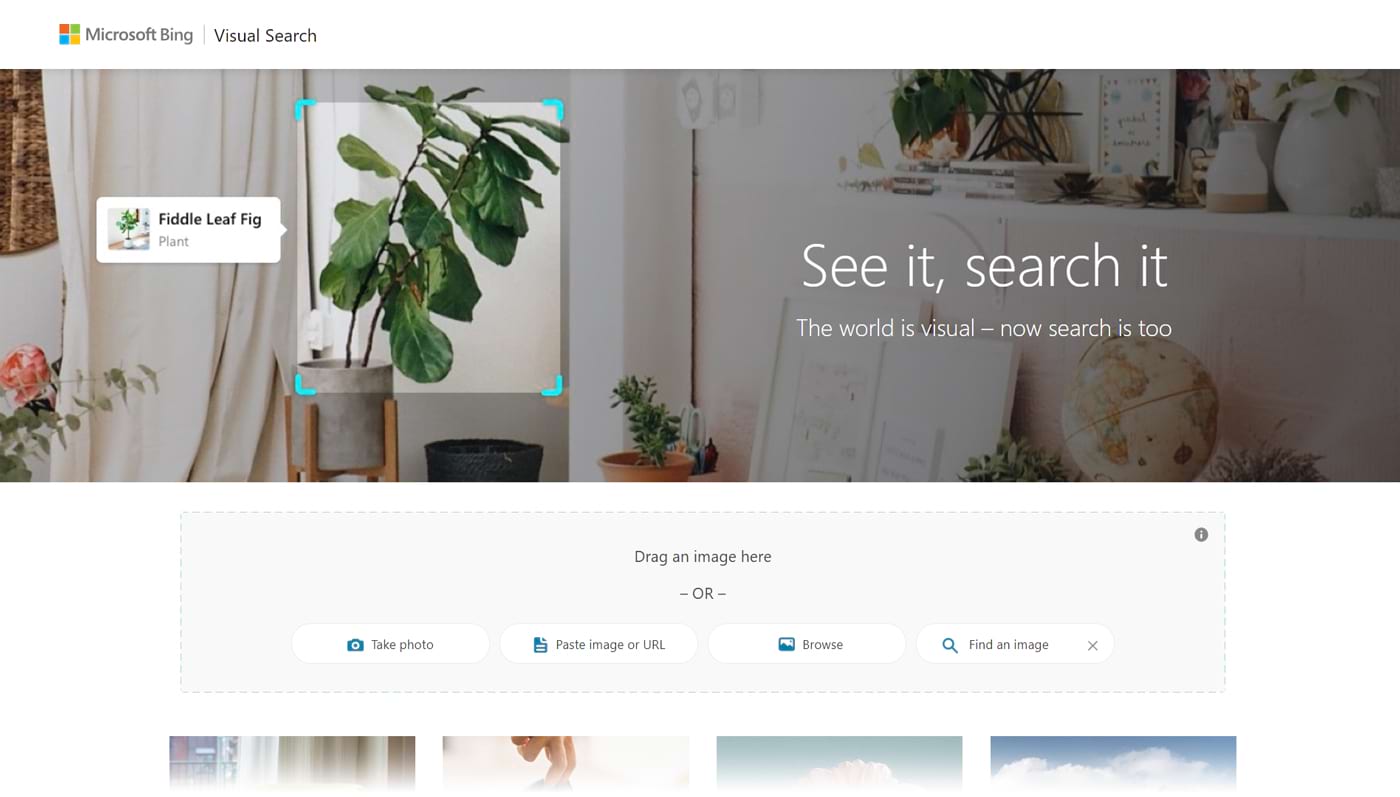
A visual search is a search method where a person uses an image—like a photo or drawing—to look for information on search engines.
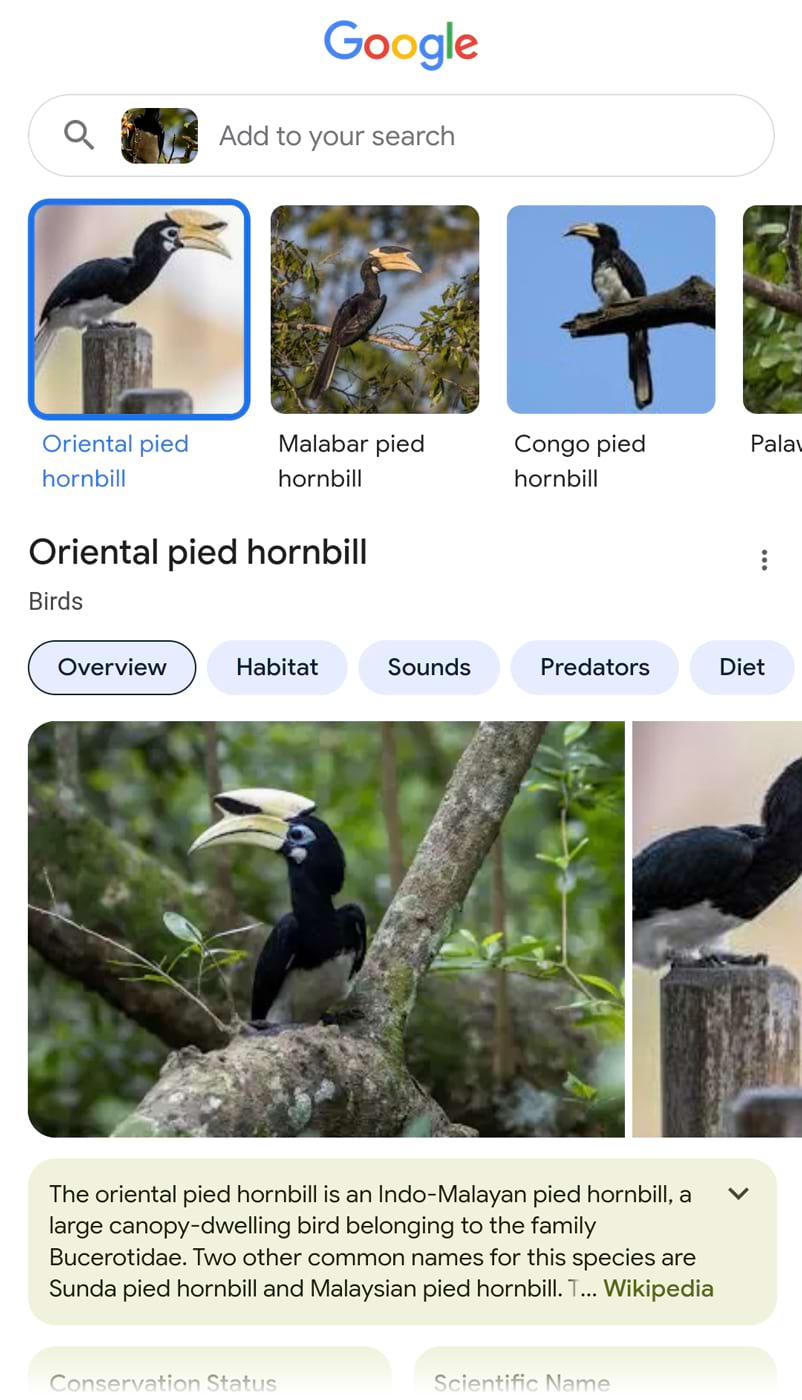
Let’s say you come across an image of an unfamiliar animal. By uploading the image to a visual search engine, you can learn the animal’s name. And habitat.
And get more images of the same animal.
How Visual Search Differs from Image Search
While visual and image searches both produce image results, they have key differences.
Search Query Format
Visual search queries are in image format.
For example, say you want to use a visual search engine to get more information about a flower in your yard. You’ll need to provide the search engine with a picture of the flower.
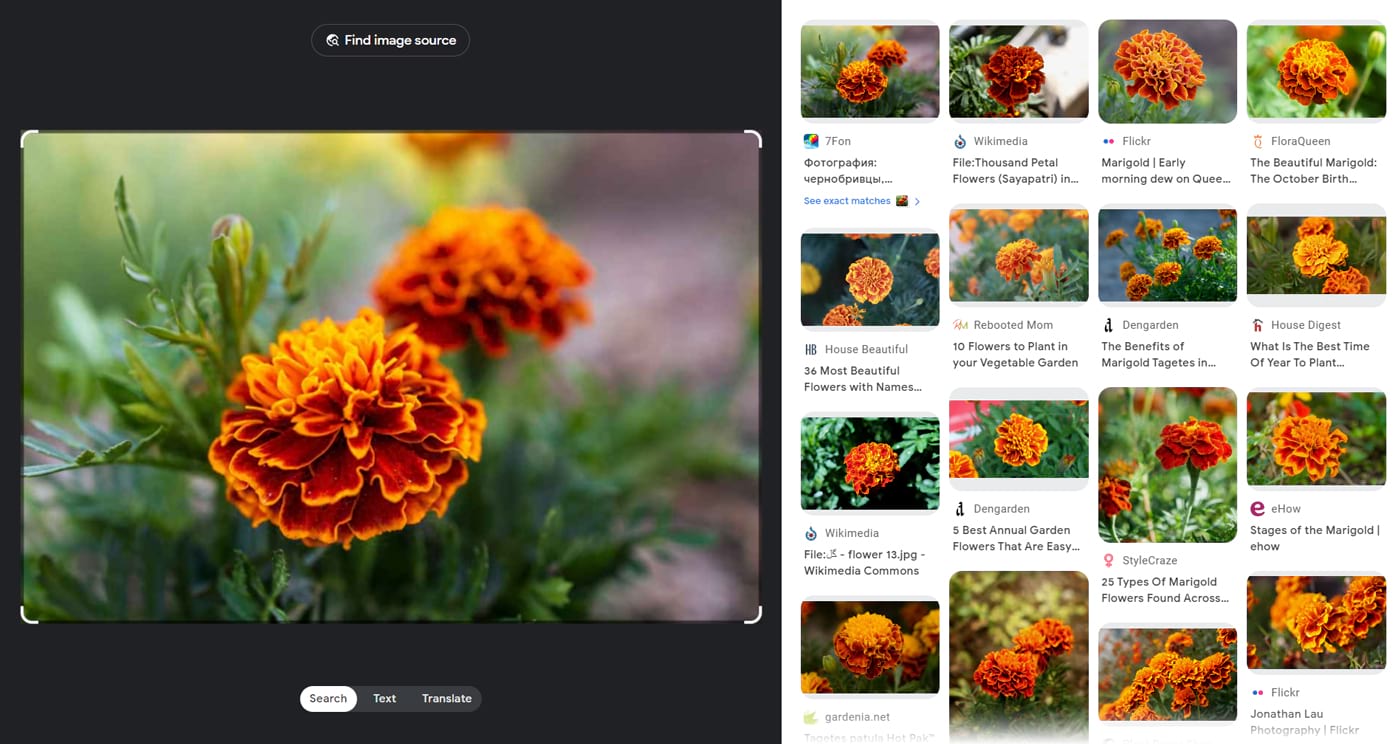
Image search queries are in text format.
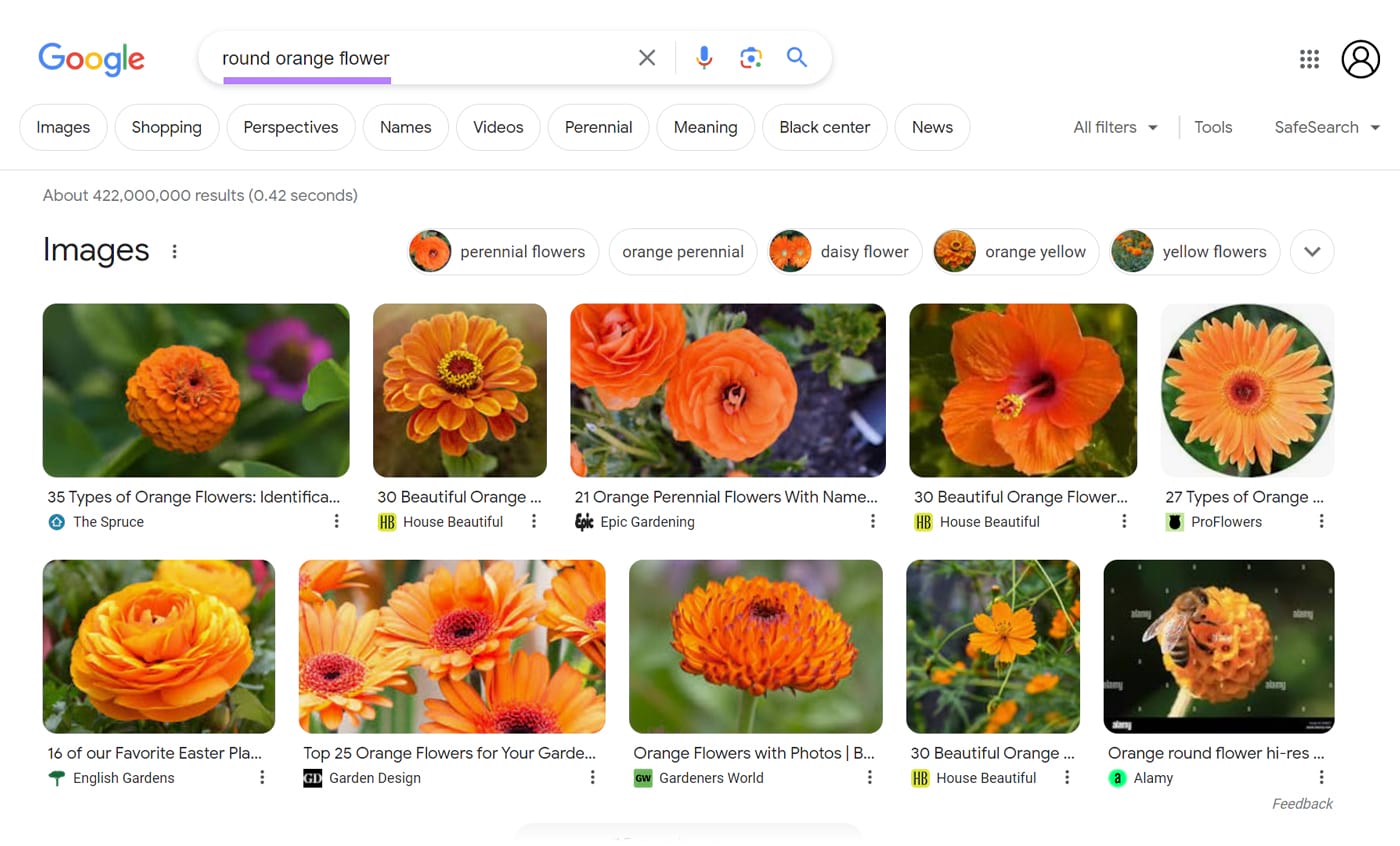
To get more information about a particular flower using an image search, you’ll need to type the flower’s name into the search engine. Or a description of the flower.
Use Cases
Visual search is helpful when:
- You’re unsure of the object’s name. Visual search engines can analyze the image to identify the object. And provide you with information.
- You’re looking for similar objects. Visual search engines excel at displaying images similar to the one you’ve shared.
Image search is helpful when:
- You don’t have a reference image. In this case, use text to describe what you’re looking for.
- You’re looking for images with certain characteristics. Use descriptive text queries to narrow your search.
Further reading: 21 Best Search Engines in the World
How Visual Search Works
Visual search works by having a visual search engine recognize an image and compare it against other images in its database.
The visual search engine then shortlists images, ranks them based on relevance, and displays them to the user. It may also provide related information.
Like the names, locations, and prices of objects in the images.
In the process, the visual search engine may use one or both of these techniques:
- Search by example: The visual search engine looks for images relevant to the source image. In terms of shared identifiers like shape and color.
- Search by metadata: The visual search engine looks for images with metadata relevant to the source image. This metadata includes an image’s filename and alternative (alt) text.
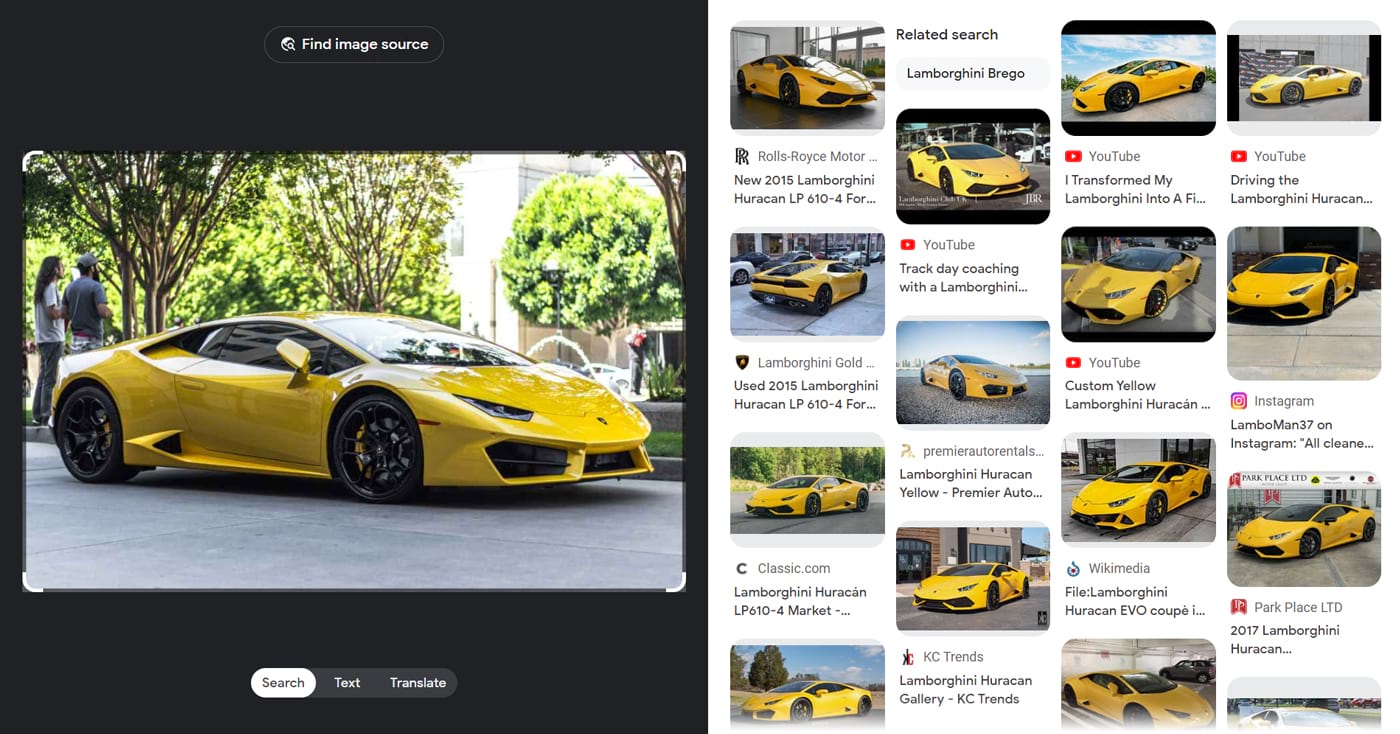
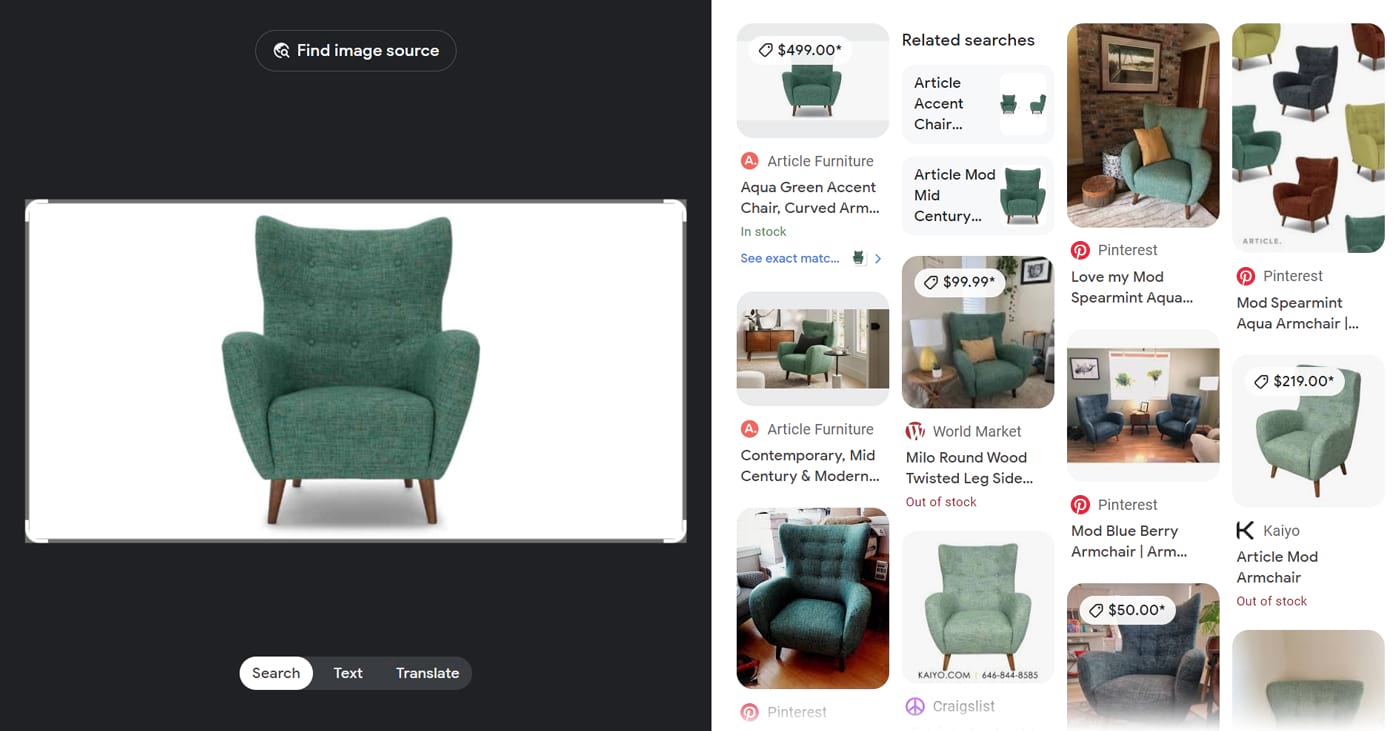
For example, when you search for a product image of a sandal with Google Lens, a visual search engine, you get these results:
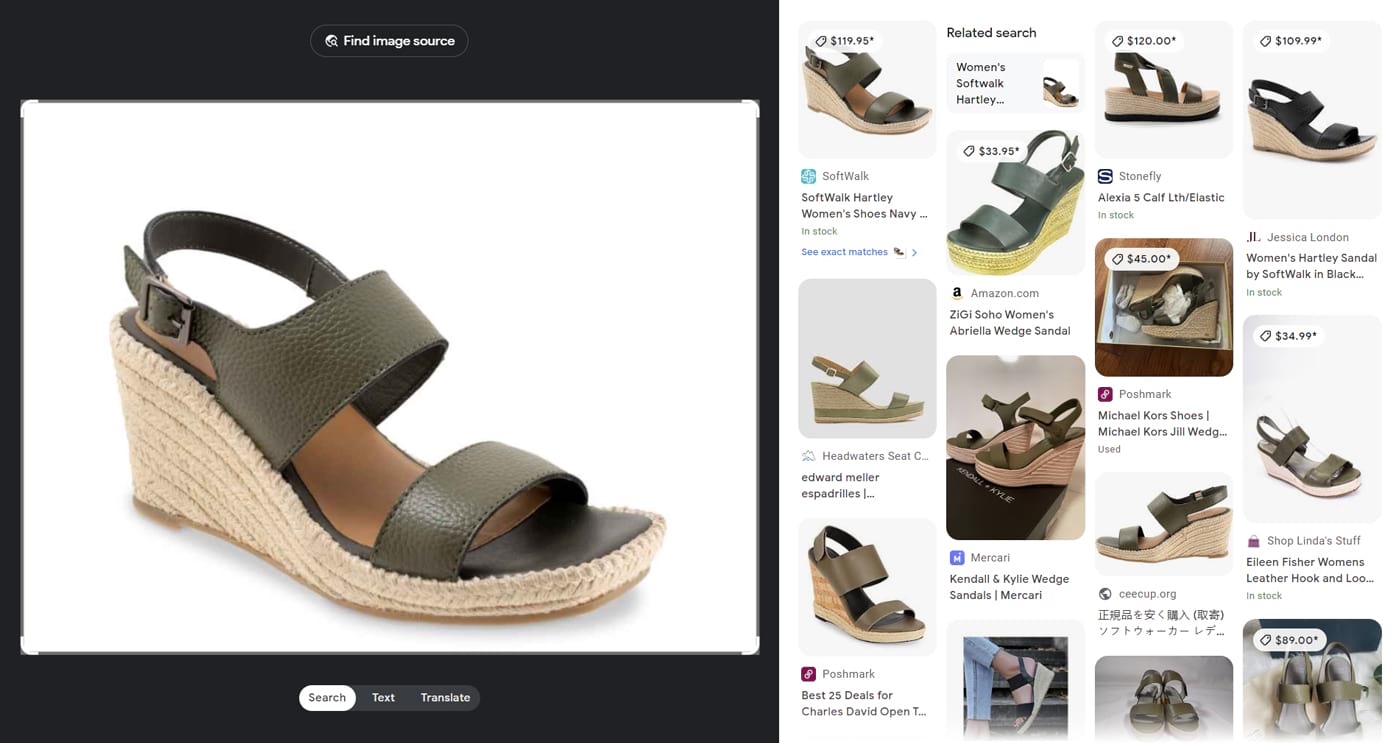
Google Lens shows where to find this sandal online. And others like it. It also tells you how much each one costs for easy price comparison.
The Role of AI in Visual Search
Visual search involves various fields of artificial intelligence (AI). So the visual search engine can understand an image’s contents. And identify other relevant images. Just like a human can.
These AI fields include:
- Computer vision: Helps the visual search engine “see.” And recognize images.
- Machine learning: The visual search engine “learns” concepts by analyzing sample images containing these concepts in a database. By doing so, it can identify whether other images contain—or don’t contain—these concepts.
Let’s say you give a visual search engine hundreds of pictures of cars of different makes, models, and colors.
The visual search engine uses computer vision to “see” the cars in these pictures. And as it analyzes them, it “learns” what a car looks like.
As a result, when you share a new picture of a car that isn’t in the visual search engine’s database, it can correctly identify the picture as a car. Even if it has never “seen” this picture before.
6 Visual Search Engines and Tools
Various brands have added visual search engines and tools to their platforms.
Here are six of these tools. And how to do a visual search in each of them.
1. Google Lens
Google Lens is Google’s visual search engine. It can identify images, translate text, and offer homework help.
Google Lens is available on Google’s desktop browser. And mobile apps like the Google app, Google Photos, and Pixel Camera.
Here’s how to use Google Lens on the Google app:
- Download the Google app
- If you’re taking a photo, tap the camera icon at the top of the screen
- Tap “Allow” to let the Google app access your camera
- Click “Continue”
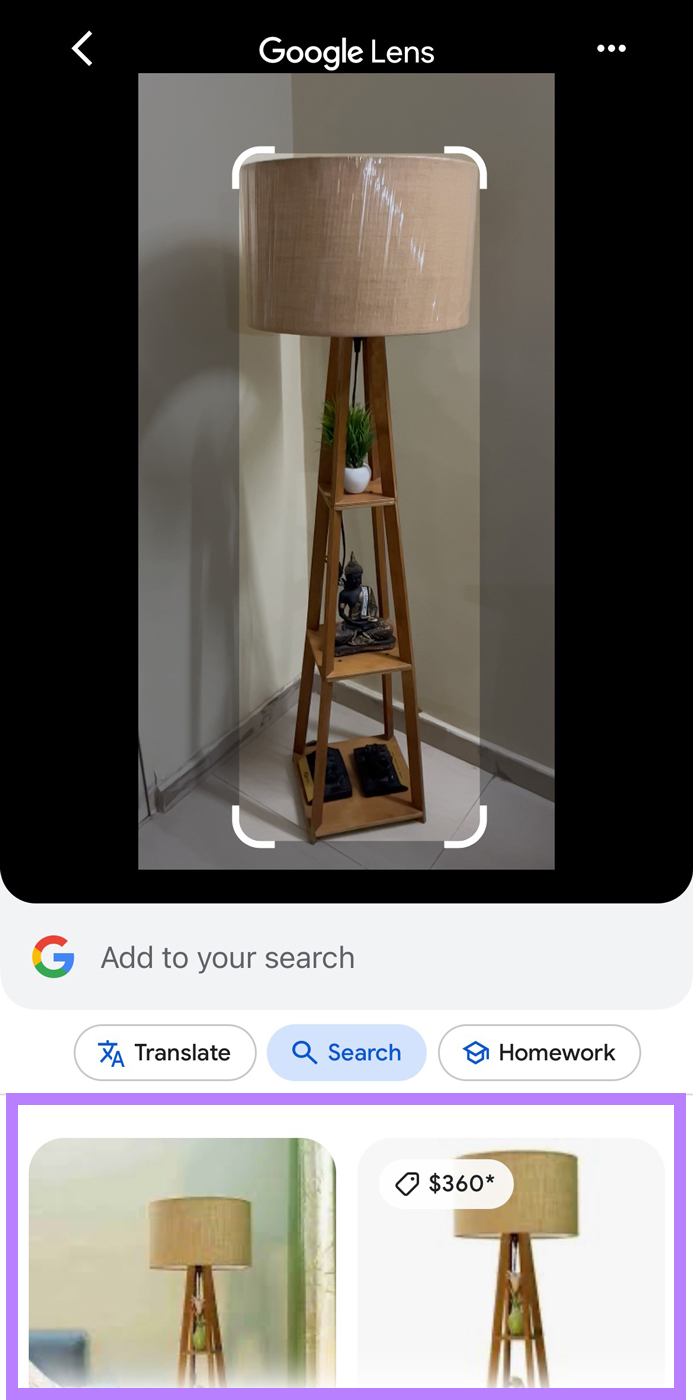
- Point your device at an object you want to learn more about
- Tap the magnifying glass button to take the photo
- Google will isolate an object in the image. And list search results containing relevant images below it.
Alternatively, provide Google with an image from your image library.
Here’s how:
- Tap the image library icon at the bottom left of the screen.
- Your image gallery will appear
- Tap the “OK” button on the “Private Access to Photos” message
- Tap the image you want to use for the search
- Google will list image results relevant to the main object it detects in your image
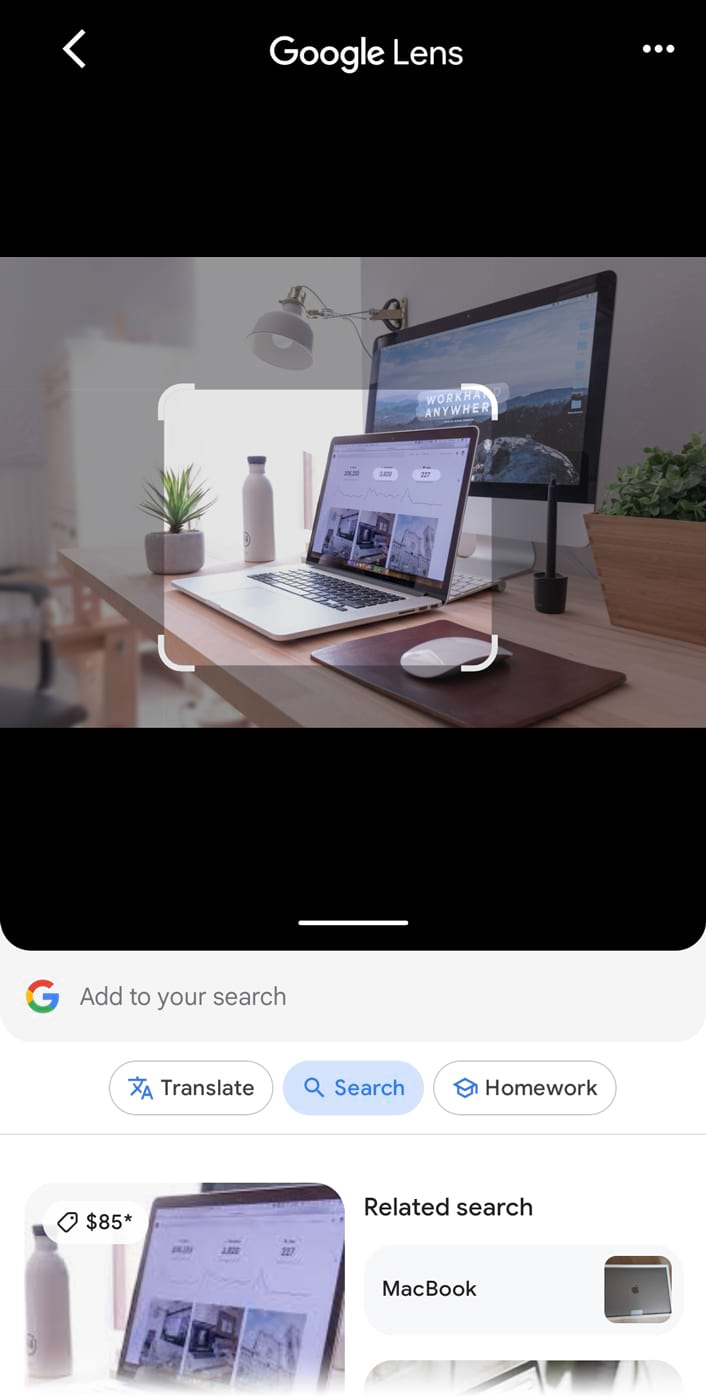
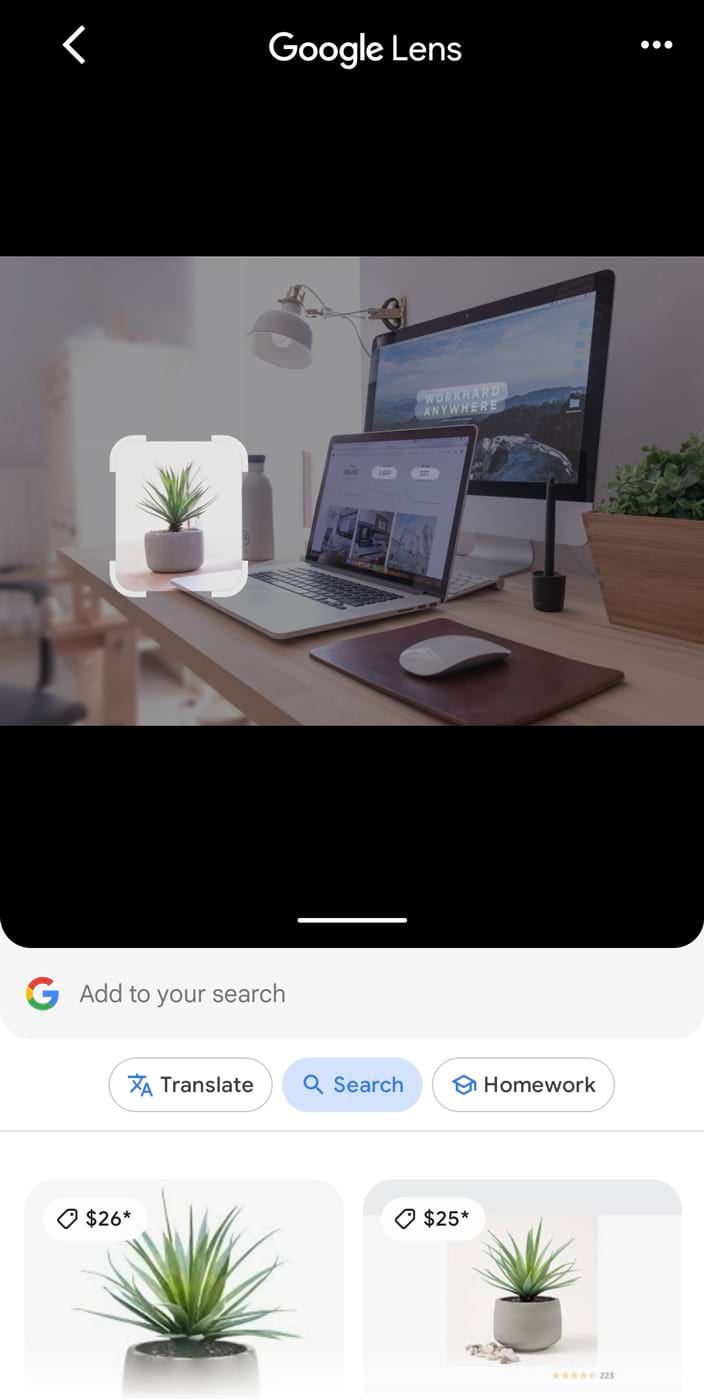
After Google displays its visual search results, you can have it get information on a different object in the image.
This is helpful if the search engine didn’t identify the correct object. Or if you want to search for information for another object as well.
- Tap and drag the white crop handles to isolate the object
- Tap “Add to your search” to provide more context on what you’re looking for
2. Google Circle to Search
Circle to Search is a Google feature that lets you highlight objects on your mobile phone screen. To search for information.
To use Circle to Search, navigate to the content you want to search. This could be an image in your gallery, a video, or a social media post.
Press and hold the “Home” button or navigation handle at the bottom of your phone screen.
Your phone screen will freeze. Use a finger to circle, highlight, tap, or scribble over the object.
Google will analyze the object. And list search results containing relevant images.
Image Source: The Keyword
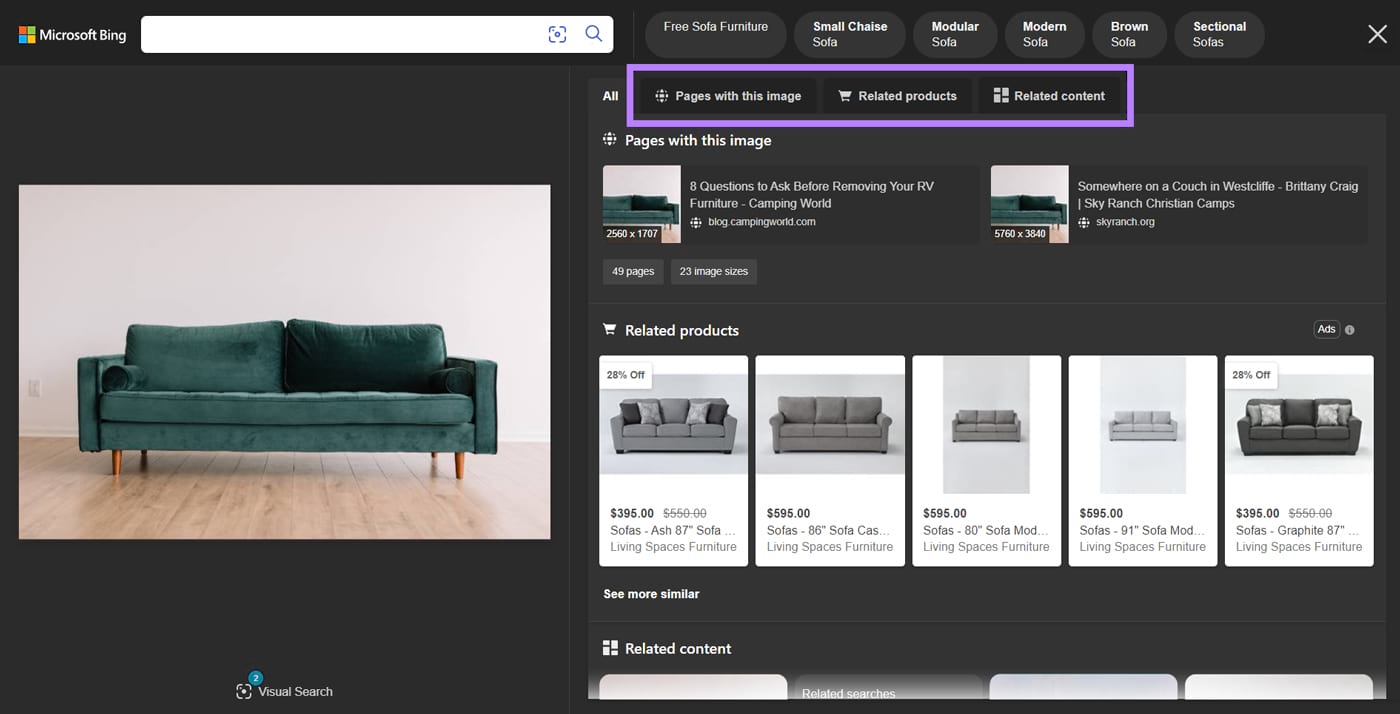
3. Bing Visual Search
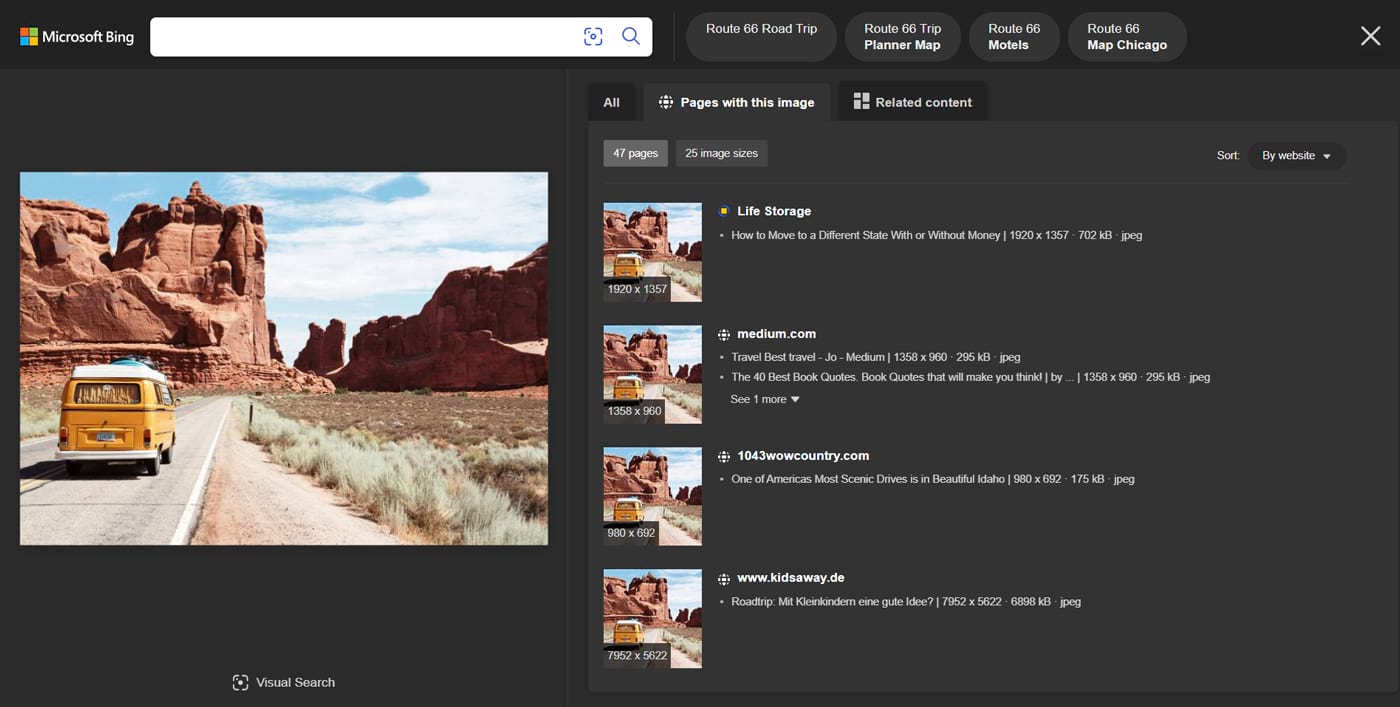
Bing Visual Search is Microsoft’s visual search engine tool.
But unlike its Google counterpart, Bing Visual Search offers visual search result filters.
Bing will analyze your image. And provide search results like:
- Pages containing the exact same image
- Pages featuring related content
- Pages featuring related products
Bing Visual Search is available on desktop, laptop, and mobile.
Here’s how to use Bing Visual Search on a desktop:
Select your preferred search option:
- Drag an image into the upload box
- Take a photo
- Paste the image or its URL
- Select it from your computer’s file directory
- Type what you’re looking for into “find an image”
Bing will return a variety of results. Click “Pages with this image,” “Related content,” or “Related products” tabs. To filter the results.
If needed, crop your image to help Bing focus on a certain object. Click the “Visual Search” option below your image.
Use the crop handles that appear to isolate your target object. Bing will automatically run new visual searches as you do so.
Further reading: Bing Search Guide: History, AI Features, and SEO Tips
4. Pinterest Lens
Pinterest Lens lets you search for content bookmarks (or “Pins”) on the Pinterest platform by taking a photo. Or uploading an image of an object.
Here’s how to use it:
- Access Pinterest Lens by installing the Pinterest app on your mobile device
- Open the app and sign in to your Pinterest account. Create an account if you don’t have one.
- Tap the “Search” icon on the bottom navigation bar
- On the “Search” page, tap the camera icon at the right of the search bar
- Tap “Allow” to grant Pinterest access to your camera
- The app will ask for access to your image library
- Select “Allow Full Access” to give the app full access to your image library. Alternatively, select “Limit Access…” to choose the specific images the app can access.
- Point your mobile device at an object you want to search
- Tap the camera button to take a photo of it
- Alternatively, tap the image gallery icon to upload an image from your image library
Pinterest will analyze your image and list Pins of related content in an “Explore” tab.

Tap any Pin to get options like:
- Visiting the Pin’s associated page
- Saving the Pin to your Pinterest board
- Following the Pin’s creator
Tap the “Shop” tab to view Product Pins relevant to your image.
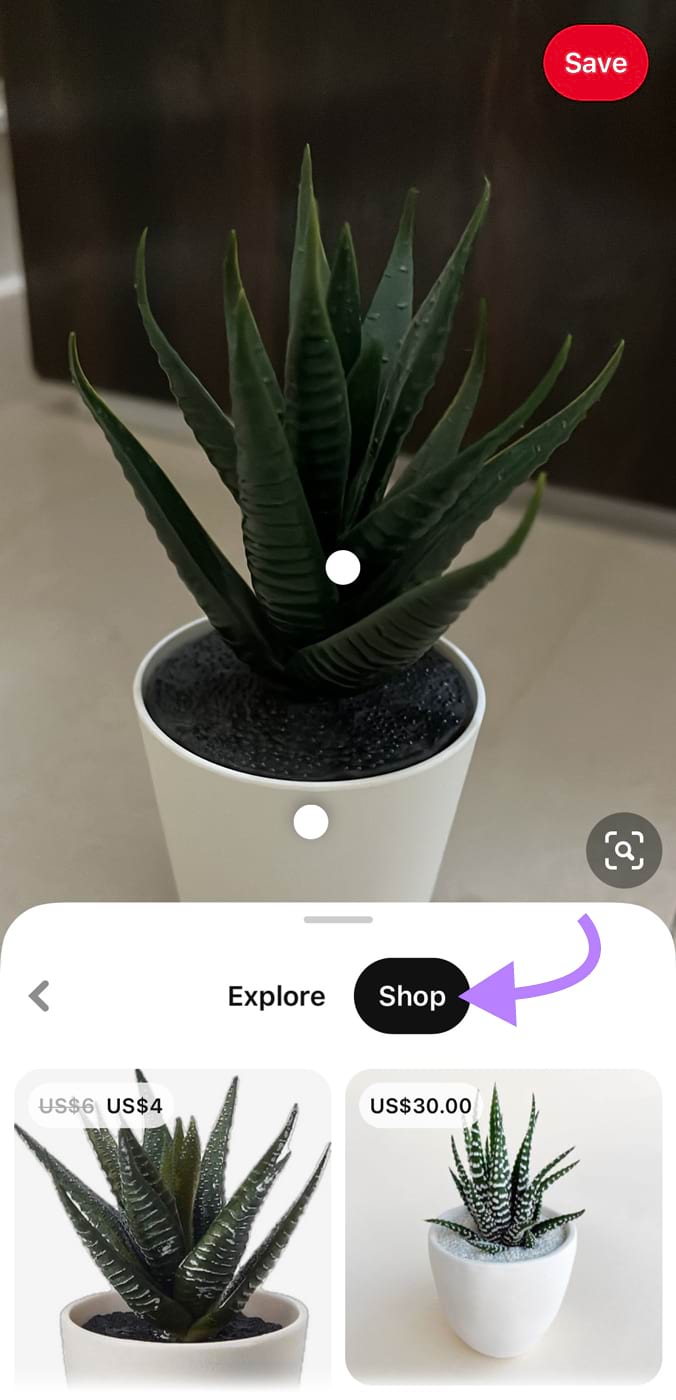
Tap any Product Pin to take actions like:
- Viewing the details of the product associated with the Product Pin
- Visiting the Product Pin’s product page (and buying the product)
- Saving the Pin to your Pinterest board
If you need to adjust your image’s target object, tap the crop icon.
Crop handles will appear. Use them to isolate your intended target object. And Pinterest will update its visual search results to match.
Further reading: Social Media SEO: How to Rank Higher on Social Media and Google
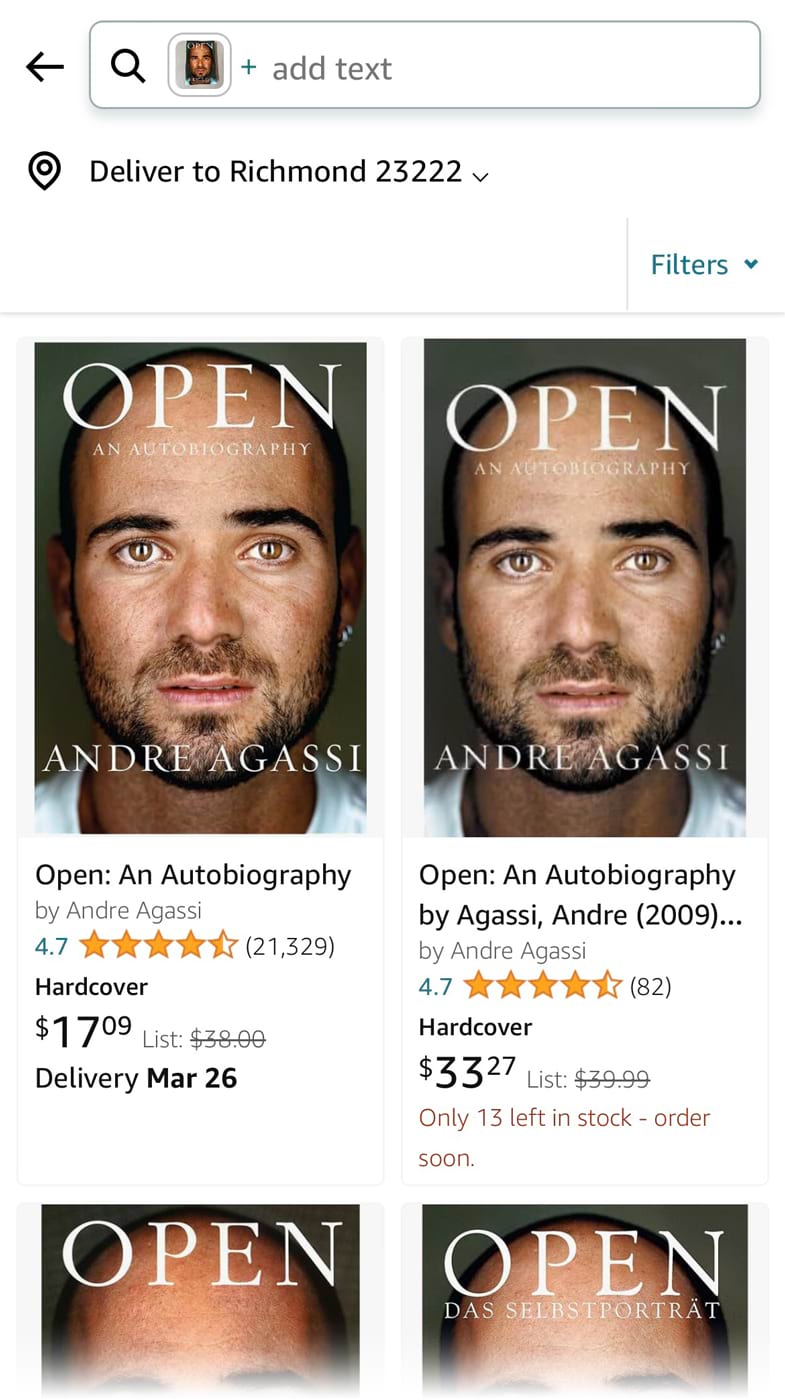
5. Amazon Lens
Amazon Lens is Amazon’s visual search feature. For searching product listings via an image.
The mobile app version of Amazon Lens lets you take a photo. Or scan a barcode of a product you want to search. The browser version lets you upload a product image from your device.
- To use Amazon Lens, install the Amazon app on your mobile device and log in. Create an account first if you don’t have one.
- Tap the camera lens icon at the right of the search bar on the app’s home screen
- A message will appear at the bottom of the screen asking you to agree to Amazon’s conditions of use. Tap the “Continue” button.
- Grant the app access to your camera
- Select the “Allow the Amazon app to access your camera and skip this step in the future” checkbox. If you want to grant camera access for future uses of Amazon Lens automatically.
- After that, tap “Continue”
- An “‘Amazon’ Would Like to Access the Camera” message will pop up. Tap “Allow.”
- From the “Search” tab of Amazon Lens, point your device at a product you’re interested in
- Tap the magnifying glass button to take a photo
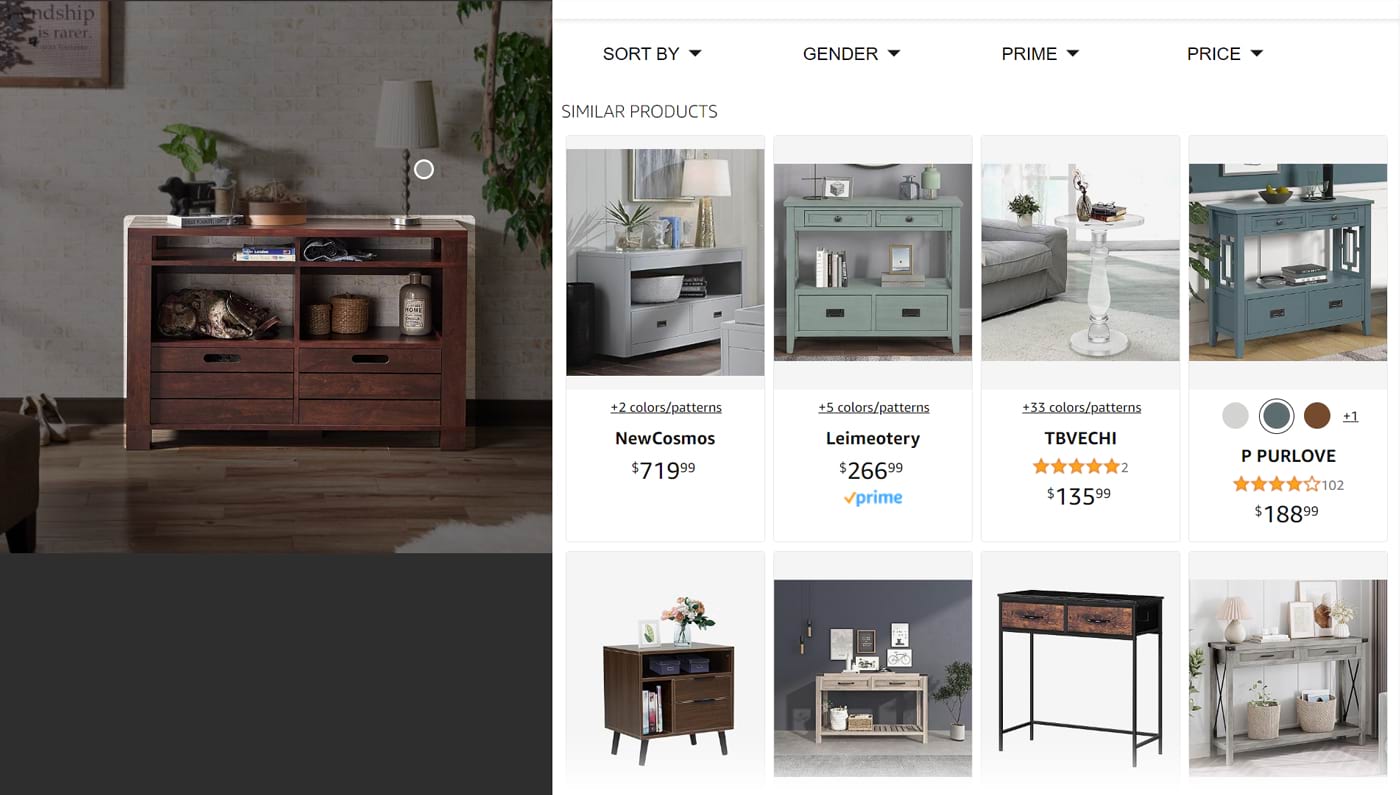
Amazon will display product listings relevant to the object in your photo. Tap any of them to browse it in more detail. And place an order.
Amazon also lets you scan product barcodes. This is helpful for price comparison.
- Start a barcode scan by tapping the “Barcode” tab at the bottom of the Amazon Lens screen
- Align your product’s barcode with the barcode graphic in the middle of your device screen
- Amazon will display listings related to the product’s barcode for you to browse. And buy.
If you prefer to upload an image to Amazon Lens, you can do so from your browser. (Not the app.)
- Navigate to amazon.com/shopthelook from either your desktop or mobile browser
- Select “Upload a Photo” and upload your image
- View the product listings related to your image
6. Snapchat Scan
Snapchat Scan can automatically detect QR codes. And Snapcodes—Snapchat’s proprietary version of the QR code.
This provides convenient access to Snapchat features. And other online content.
Here’s how to use Snapchat Scan:
- Download the Snapchat app on your mobile device
- Log in to your Snapchat account
- If this is your first time using the app, a “Snapchat Would Like to Access the Camera” message will appear
- Tap “Allow” to let the app use your camera
- The app will also ask for microphone access. What you choose here doesn’t matter—Snapchat Scan doesn’t use your microphone.
- Next, grant the app access to your photo library. Select “Limit Access.” Or “Allow Full Access,” depending on the extent of access you want to provide.
- The app will ask to access your contacts. Snapchat Scan doesn’t use your contacts’ information. Choose “Don’t Allow” or “Allow,” depending on your preference.
- With the app set to the “Camera” tab, point your device at a Snapcode. Or QR code.
- If Snapchat detects it, an “[Item] detected” message will pop up at the bottom of the app
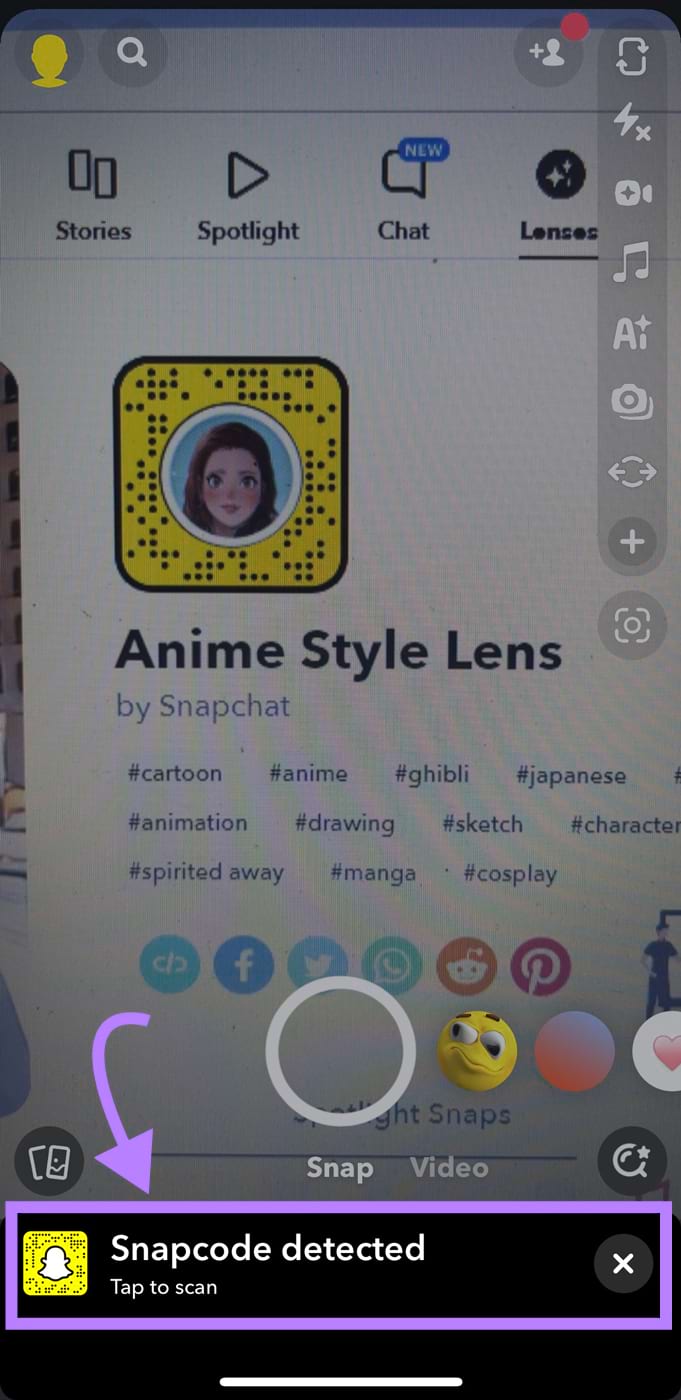
Tap the message to use the Snapcode or QR code in a variety of ways:
- Apply the Snapcode’s augmented reality filter (or “Lens”)
- Add the associated Snapchat user to your friends list
- Open the QR code’s associated webpage
If Snapchat doesn’t automatically detect a Snapcode or QR code, manually activate a scan.
- Tap and hold any part of the “Camera” screen—except the app’s buttons
- Or tap the lens icon at the right of the “Camera” screen
What Are the Benefits of Visual Search?
Learn Who Has Used Your Images
Discover websites that have used your images using a visual search.
This is helpful if you want to:
- Ask the website owner to credit you for the image. And give you a backlink.
- Take legal action against websites that have used your images without permission
To do a visual search of your images, use a visual search engine like Google Lens or Bing Visual Search.
For this example, we used Bing Visual Search. And selected “Pages with this image.” To get a list of pages with highly similar images. Or identical images to the one we uploaded.
Go through the list of pages. And decide on your next steps. For example, ask for image credit and a backlink. Or reach out about potential copyright infringement.
Repeat this process for each image you want to search.
Enhance the User Experience
Visual search provides a more intuitive and convenient way for users to find what they're looking for online.
Instead of typing in search queries, users can simply upload an image. To find similar products or information.
Increase Brand Awareness
Visual search tools provide a unique opportunity to reach new audiences.
For example, if someone comes across one of your products and wants to learn more, they can take a photo. And run a visual search.
This will pull up relevant pages about your product. Making it a convenient way for the person to learn about your brand.
Close More Sales
Visual search makes it convenient for users to buy your products.
After uploading an image, visual search engines list the sites selling that item. Or similar items. They also display pricing. For easy comparison shopping.
How to Optimize Your Images for Visual Search
Optimizing images for visual search can help you rank higher for relevant search queries.
Produce High-Quality Images
Visual search engines have an easier time understanding—and ranking—high-quality images.
Follow these best practices:
- Ensure the image’s object(s) are in focus. Visual search engines may have trouble recognizing blurry objects.
- Photograph your objects in a sufficiently bright environment. The image should be bright enough for visual search engines to recognize the objects in it.
- Make the main object the focus of your images. Prominently display the main object in the center of the image.
Optimize Image File Sizes
Keep your images’ file sizes as small as possible. This helps your pages load faster. And potentially rank higher than slower pages with equally relevant content.
To reduce your images’ file sizes, follow these tips:
- Use the appropriate file format. For example, saving your photo in JPG file format can help significantly reduce its file size without too much quality loss.
- Use the appropriate image dimensions. Images with larger dimensions tend to have larger file sizes. Produce your images in their required dimensions. Don’t upload an overly large image and shrink it on the page later.
- Compress images. Tools like Compressor.io and Optimizilla can help you reduce your images’ file sizes. Before you add them to your webpages.
Test Your Images’ Recognizability
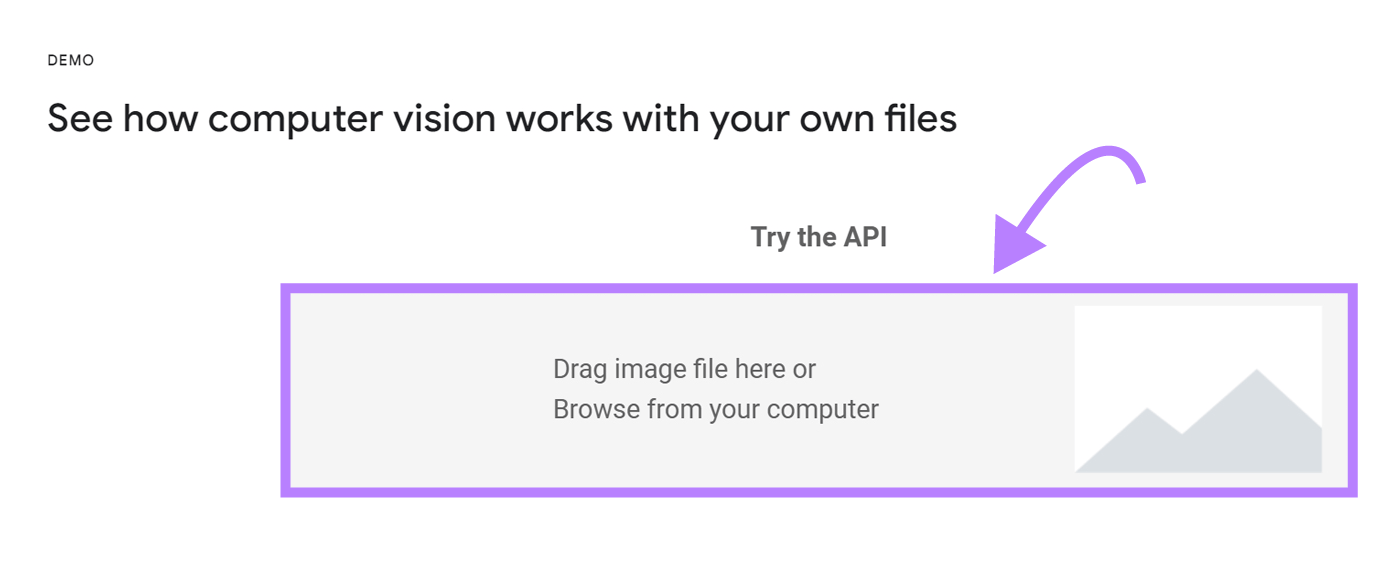
Use visual search tools like Google Cloud’s Vision AI. To check whether visual search engines can recognize your images.
Scroll down to the “Demo” section. Drag your image file to the upload box or click the upload box. To select your image file from your computer’s file directory.
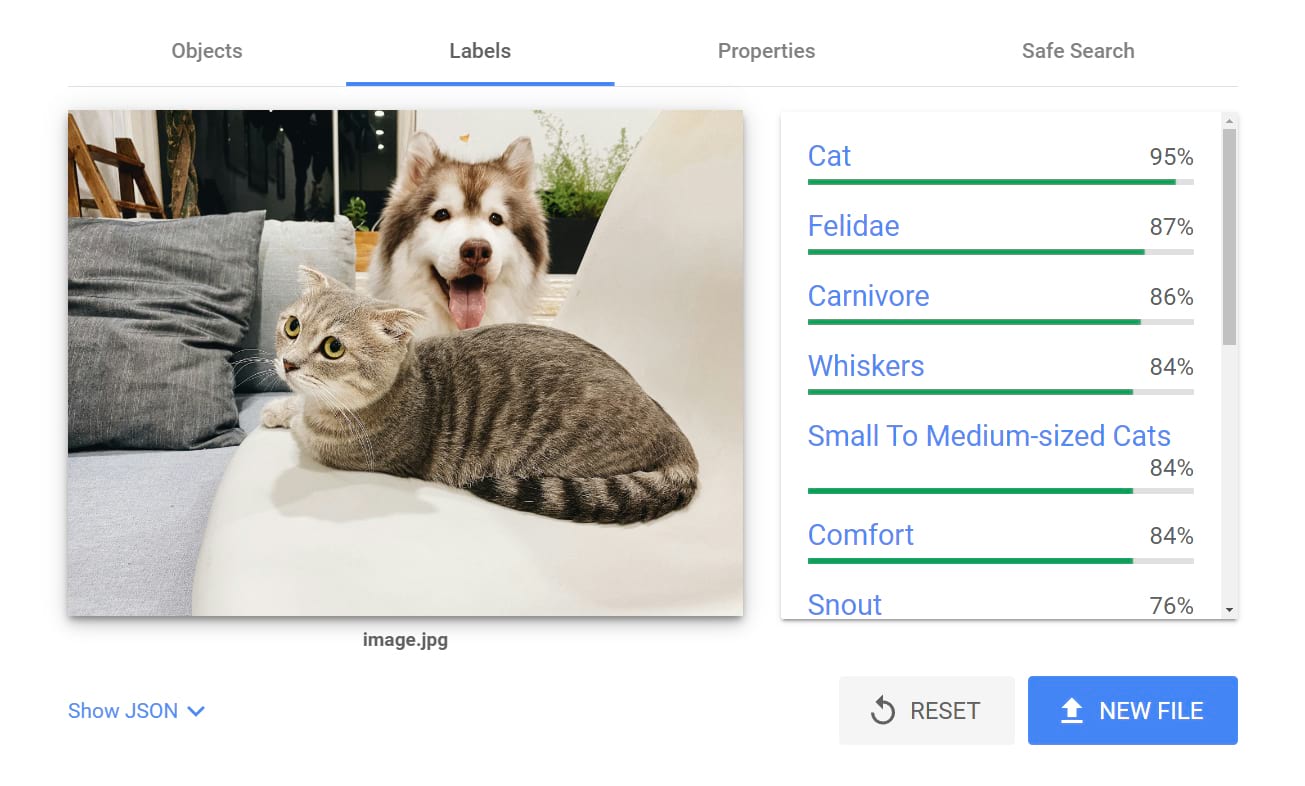
Vision AI will analyze the image and display tabs with various details:
- Objects: A list of objects Vision AI has detected in the image. And a confidence score out of 100% for each object. A higher score indicates the tool’s increased certainty it has identified the object correctly.
- Labels: For object characteristics like items, locations, and animal species
- Text: Any text Vision AI has detected in the image
- Properties: These include the image’s dominant colors and crop hints—i.e., suggested aspect ratios for cropping the image
- Safe Search: How likely your image is to trigger Google’s SafeSearch filters for adult, violent, or other potentially sensitive content
Toggle between each tab to access the information.
If Vision AI has identified your image’s objects inaccurately, reported low confidence scores, or displayed other unexpected results, try to diagnose the cause of the issue.
Adjust your image accordingly. Then, test your image again.
For example, if you think Vision AI has wrongly identified your photo’s objects because it’s too dark, retake the photo. And have Vision AI analyze your new photo. To see if it can correctly identify the objects this time.
Use Descriptive File Names
Use a short description of your image as its file name. Search engines may consider it when trying to understand your image. And display and rank it for relevant visual search results.
For instance, if your image is of the Golden Gate Bridge, its filename could be “golden-gate-bridge.jpg.”
Avoid using generic filenames like “IMG_3410.jpg” and “image1.png.”
Mark Up Images with Structured Data
Structured data, or schema markup, is a type of code that tells search engines your content’s category type. Examples of categories are carousels, products, and recipes.
Adding structured data to images and the pages they’re on helps them appear in the visual search results. For relevant categories of information.
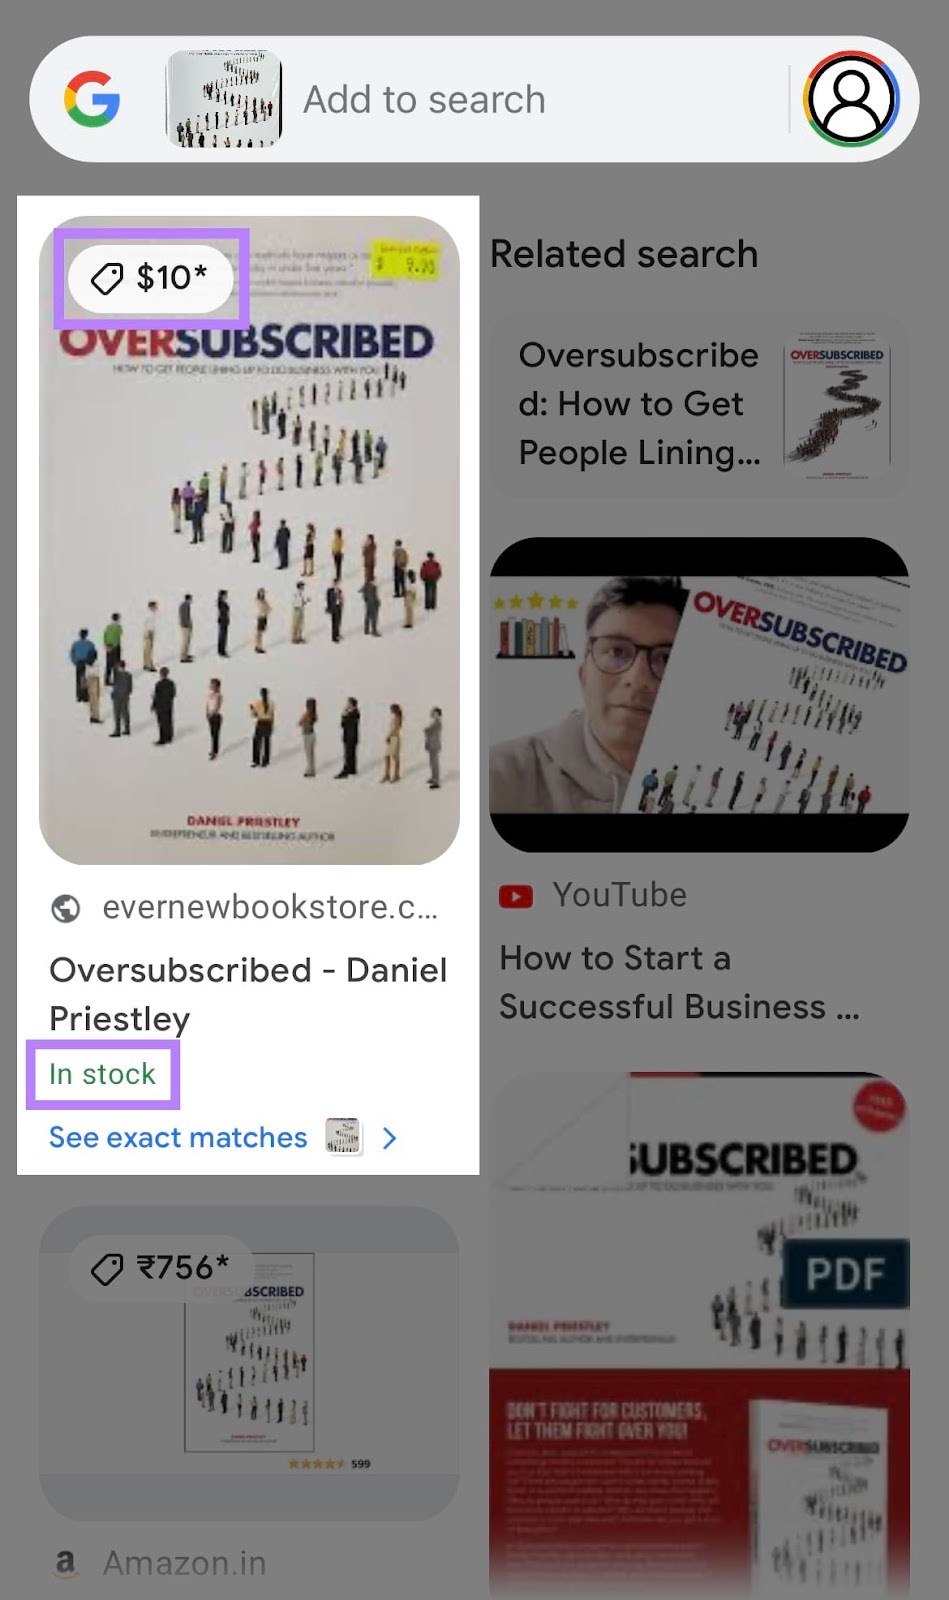
The structured data can also make your image’s search result more visually appealing. And informative. So that it attracts more clicks.
For example, a page with product structured data can display special labels for a product’s price. And availability.
Add Image Alt Text
Alt text is a descriptive attribute added to images on webpages. To provide information about the image’s contents.
Alt text is visible if an image doesn’t display properly.
Like this:
Visual search engines can use alt text to understand an image’s contents better. When ranking it for search queries.
Your image’s alt text should be descriptive. Just like its file name. But it can be longer to accommodate more details.
For example, the alt text for the image below could be:
“A white board with the quote ‘Coffee is the most important meal of the day’ in black letters.”

Image Source: Unsplash
Further reading: Image SEO and Alt Tags: 10 Image Optimization Tips
Create an Image Sitemap
An image sitemap is a set of code that tells search engines about your website’s images. Having a sitemap helps search engines discover your images. And rank them for visual search queries.
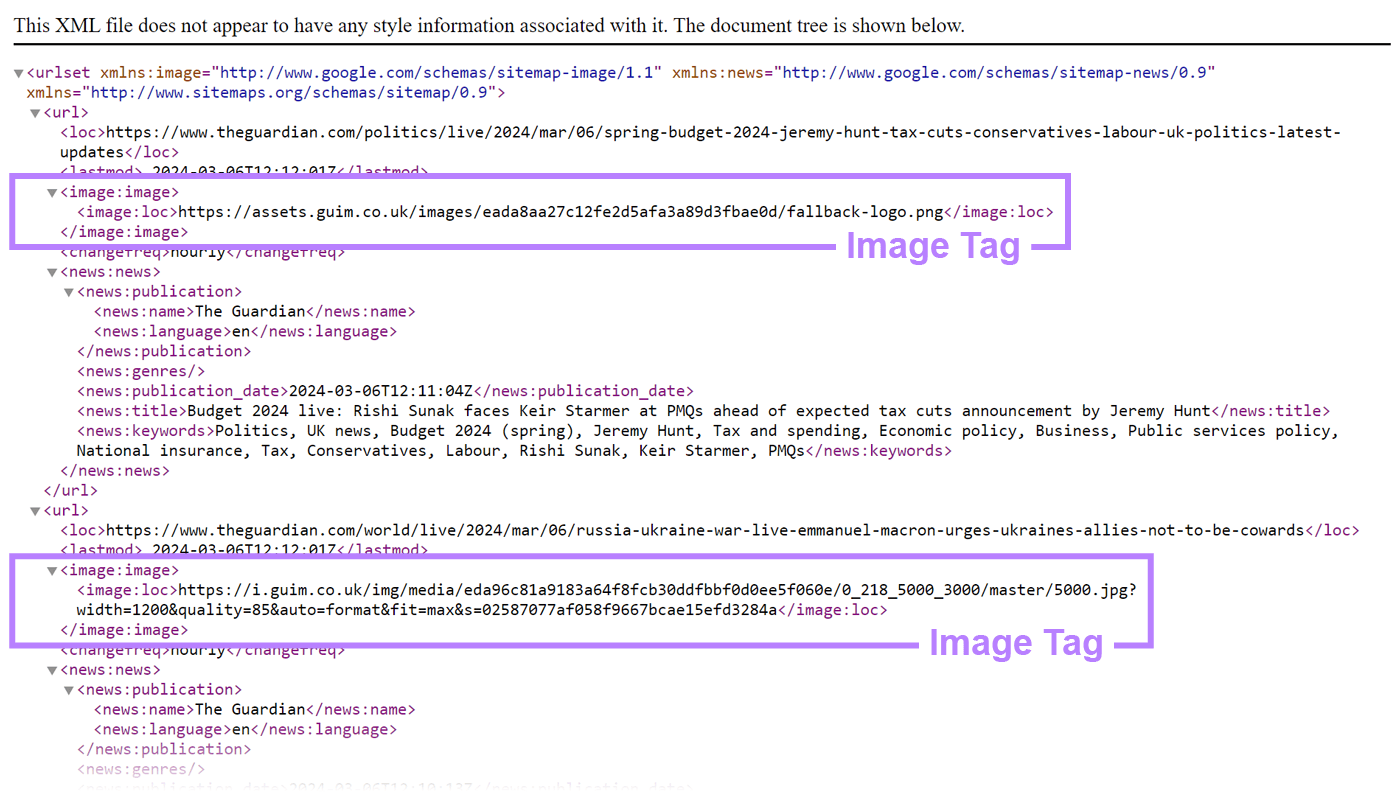
Search engines recognize two forms of image sitemaps. The first form is a dedicated image sitemap separate from your main website sitemap.
Alternatively, you can have a main sitemap that contains image sitemap tags.
This is what The Guardian has done:
Your website platform may offer options for automatically creating and managing either form of image sitemap.
For example, if you run a Squarespace website, the platform will generate a main sitemap for it.
Squarespace will automatically update the sitemap whenever you add new content. Including images.
If you’ve built your website on WordPress, install a sitemap generator tool like Yoast SEO.
Apply New Search Technology to Your Business
Use the methods above to help your website rank higher for relevant visual searches. And capture more traffic.
But visual search isn’t the only way for users to find your website.
Help searchers discover your site using digital marketing tools.
Like these:
- Keyword Magic Tool: Find the phrases and questions people use to look for information relevant to your business
- Site Audit: Detect technical issues like missing alt text, broken links, and 404 errors that may be hurting your rankings
This post was updated in 2024. Excerpts from the original article by Suganthan Mohanadasan may remain.