An HTML image tag displays an image on a webpage. It’s a self-closing tag (meaning it’s structured in a way so you don't have to add a separate closing tag) that contains the image source and other attributes.
Here’s an example of an image html tag:
<img src="https://example.com/cat.jpg" alt="Furry white cat sitting on a wall">Now, let’s go over the HTML tag for images (also called an <img> tag) in detail.
How to Use the HTML Image Tag
You can insert the <img> tag in your HTML code anywhere you want to display an image. Like within the hero section on a product page.
And it always includes two required attributes:
- src: Indicates the path of the image that’s shown
- alt: Indicates alternative (alt) text that’s displayed if the image fails to load and for individuals using screen readers or other text-to-speech tools
The image isn’t directly embedded into the page but is loaded from the source path in the tag.
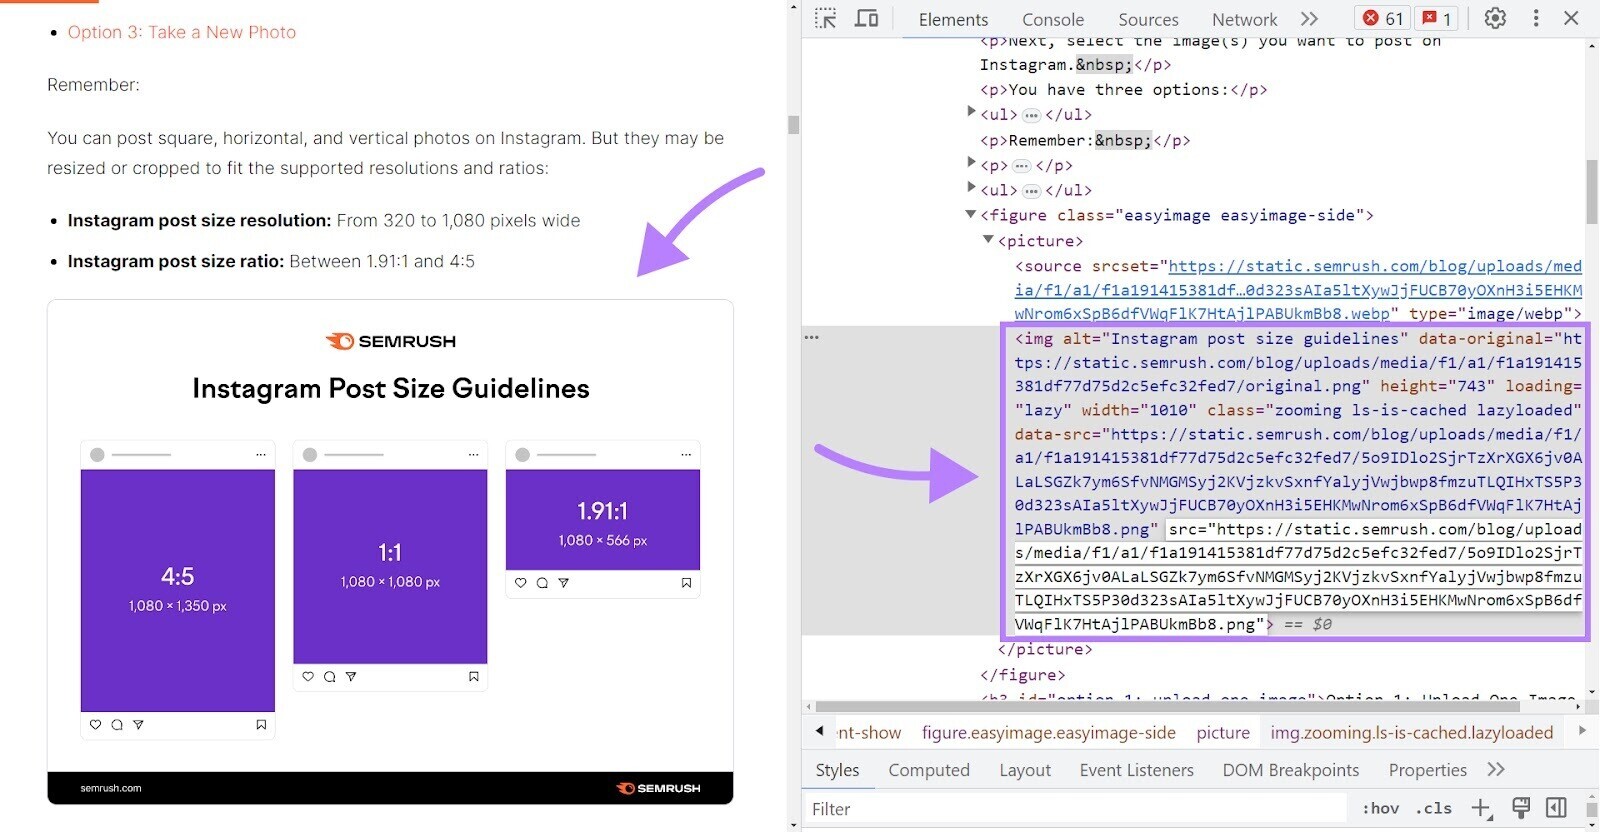
And the image can be sourced from anywhere—i.e., on the same server (referred to as a relative path) or a different one (referred to as an absolute path).
You can also nest the image tag inside other container tags—i.e., HTML tags with both opening and closing tags.
Here’s an example of an image tag nested inside an anchor tag that links to another website:
<a href="https://example.com"><img src="https://example.com/cat.jpg" alt="furry white cat sitting on a wall"></a>It creates a clickable image link.
Types of HTML Image Attributes
HTML image attributes are used to specify information about the image. You can use them to control how the images are displayed, loaded, and more.
Let’s take a look at each of these attributes one by one.
The Src Attribute
This is the most important attribute. It specifies the path to the image.
Browsers can’t find and display the image without its source path.
And the source can be either an absolute or a relative URL.
The Alt Attribute
This attribute is used to include the alternative text for the image—a text-based explanation of the image.
Browsers display this text when the image fails to load or can’t be found. Like when the user has a slow internet connection.
And it looks like this on the webpage:

It also makes the image accessible to visually impaired readers and those who prefer to listen to content rather than read it. Because screen readers and other text-to-speech tools use alt text to describe the image.
It’s also an important attribute from an SEO perspective.
Why?
Because alt text can help search engines like Google understand your content better, which can lead to higher rankings. And it’s especially beneficial for helping your images appear in image results. Especially if you include relevant keywords.
The Title Attribute
This attribute is used to set the image’s title. To provide additional context about the image.
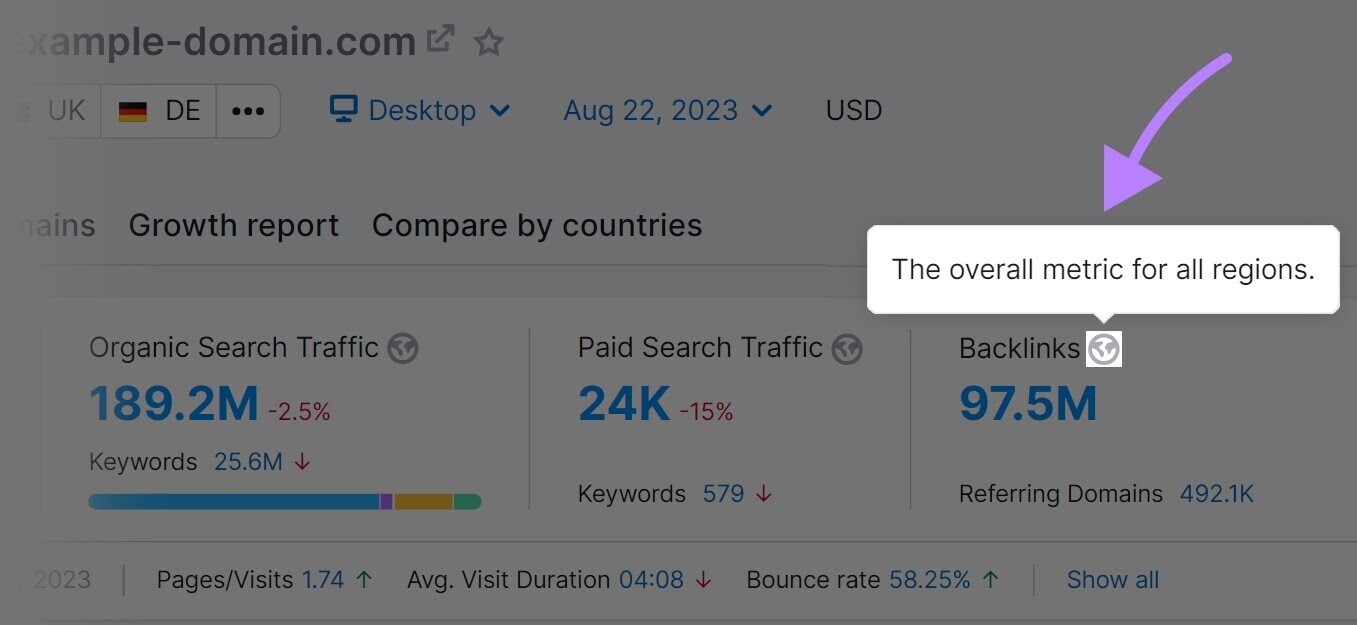
The title attribute is displayed as a tooltip—an element that displays information about the image when you hover over it with your mouse cursor.
This is what a tooltip looks like:
The Longdesc Attribute
This attribute is used to link to a webpage with a detailed description of the image. Which can be helpful for complex images that can’t be fully explained with alt text.
It can be the address of another webpage or an element within the same page.
But it’s rarely used. Because most browsers don’t support it.
The Crossorigin Attribute
The crossorigin attribute is used when loading an image from another domain.
It tells the browser to make something called a cross-origin resource sharing (CORS) request. The CORS security mechanism enables web servers to control whether other domains can access their resources. And protects sensitive information from being accessed through unauthorized requests.
The crossorigin attribute can have the following values:
- anonymous: Sends a request without credentials. It’s the same as an empty crossorigin attribute. This type of request is used to access publicly available resources.
- use-credentials: Sends a request with credentials for authentication—e.g., cookies, certificates, etc. This type of request is used to access private resources.
The Ismap Attribute
The ismap attribute represents an image map (an image with clickable areas) stored on the server. It’s only used for clickable images (i.e., <img> tags inside the <a> tags).
It’s a boolean attribute—meaning it’s "true" when present and "false" when not. And it doesn’t contain any values.
For example:
<a href="https://example.com/"><img src="https://example.com/cat.jpg" alt="Furry white cat sitting on a wall" ismap></a>When a user clicks the image, the location of the click is also sent with the request. It adds the cursor coordinates at the end of the URL.
In the above example, clicking the image at (x=33, y=45) coordinates will open the following URL:
https://example.com/?33,45The program or script on the server processes the request and performs a specific action. Or takes the user to a specific page.
It’s rarely used these days. Because it’s not helpful for users with screen readers. And using JS/CSS instead offers more efficient functionality, without depending on the server for processing.
The Usemap Attribute
The usemap attribute represents an image with clickable areas (called an image map).
Each area links to a specific address–i.e., a webpage or resource.
Information about the locations of these areas and addresses is stored in a <map> tag. The value of the usemap attribute points to the name of the associated map.
Therefore, the usemap attribute creates image maps that are processed within browsers (called client-side image maps.)
Here’s an example using the usemap attribute:
<img src="https://example.com/cat.jpg" alt="Furry white cat sitting on a wall" usemap="#cat">
<map name="cat">
<area shape="rect" coords="0,0,200,400" href="left_part.html" alt="Left Part">
<area shape="rect" coords="200,0,400,400" href="right_part.html" alt="Right Part">
</map>
The usemap tag can’t be used for clickable images.
The Loading Attribute
This specifies how browsers should load the image.
That’s determined by which of these values the attribute contains:
- eager: The image is loaded immediately (this is the default value)
- lazy: The image isn’t loaded until it's required (i.e., when the user reaches that part of the page)
Image lazy loading can improve the load time. It can improve the page performance score in Google's PageSpeed Insights—a tool that measures page performance across desktop and mobile devices.
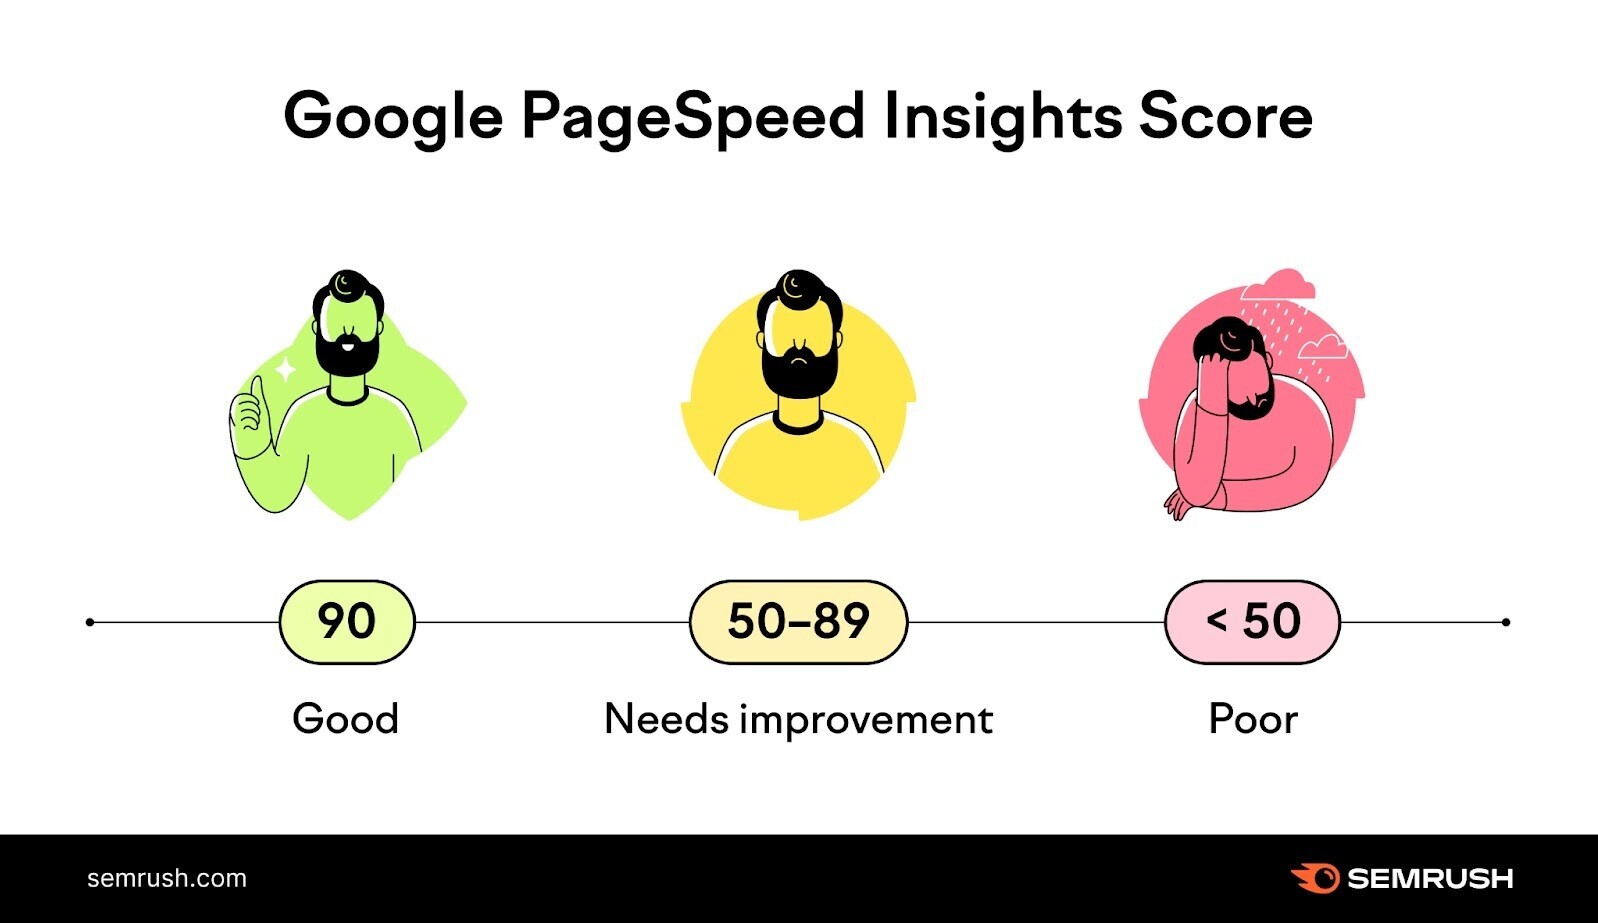
Page speed is a confirmed Google ranking factor. So, using lazy loading for images can be a good practice to improve your site's SEO.
The Referrerpolicy Attribute
This defines what referrer information to send along with the image request.
What is a referrer?
A referrer is the page the request is sent from. Meaning the page where the image is going to be embedded.
This attribute can contain any of these values:
- no-referrer: No referrer information is sent with the request
- no-referrer-when-downgrade: No referrer information is sent with requests from HTTPS to HTTP
- same-origin: The complete URL is sent with same-origin requests. No referrer information is sent for cross-origin requests.
- origin: The origin (scheme, host, and port) is sent
- strict-origin: The origin (scheme, host, and port) is sent with HTTPS to HTTPS and HTTP to any origin requests. No referrer information is sent with HTTPS to HTTP requests.
- origin-when-cross-origin: The origin (scheme, host, and path) is sent with cross-origin requests. The complete URL, including the path, is sent with same-origin requests.
- strict-origin-when-cross-origin: It’s the same as the “origin-when-cross-origin,” but no referrer information is sent with HTTPS to HTTP requests. This is the default value.
- unsafe-url: Theorigin, path, and query string are sent. (It’s not recommended as it’s unsafe to share the referrer’s complete information.)
The Srcset Attribute
This attribute is used for displaying responsive images.
It contains links to the same image in multiple sizes. And each image’s size is specified either by width or density.
This helps the browser choose the most appropriate image from the set according to the screen size and resolution.
The Sizes Attribute
This attribute is used along with the srcset attribute.
It tells the browser which image size to use under different conditions.
The Style Attribute
This attribute is used to apply inline style to the image tag. And will override any other global style applied to the image.
The style attribute can control the appearance of the image tag. It can contain elements such as image border, shadow, and alignment.
The Height Attribute
This attribute is used to specify the height of an image in pixels. Like in the image below.
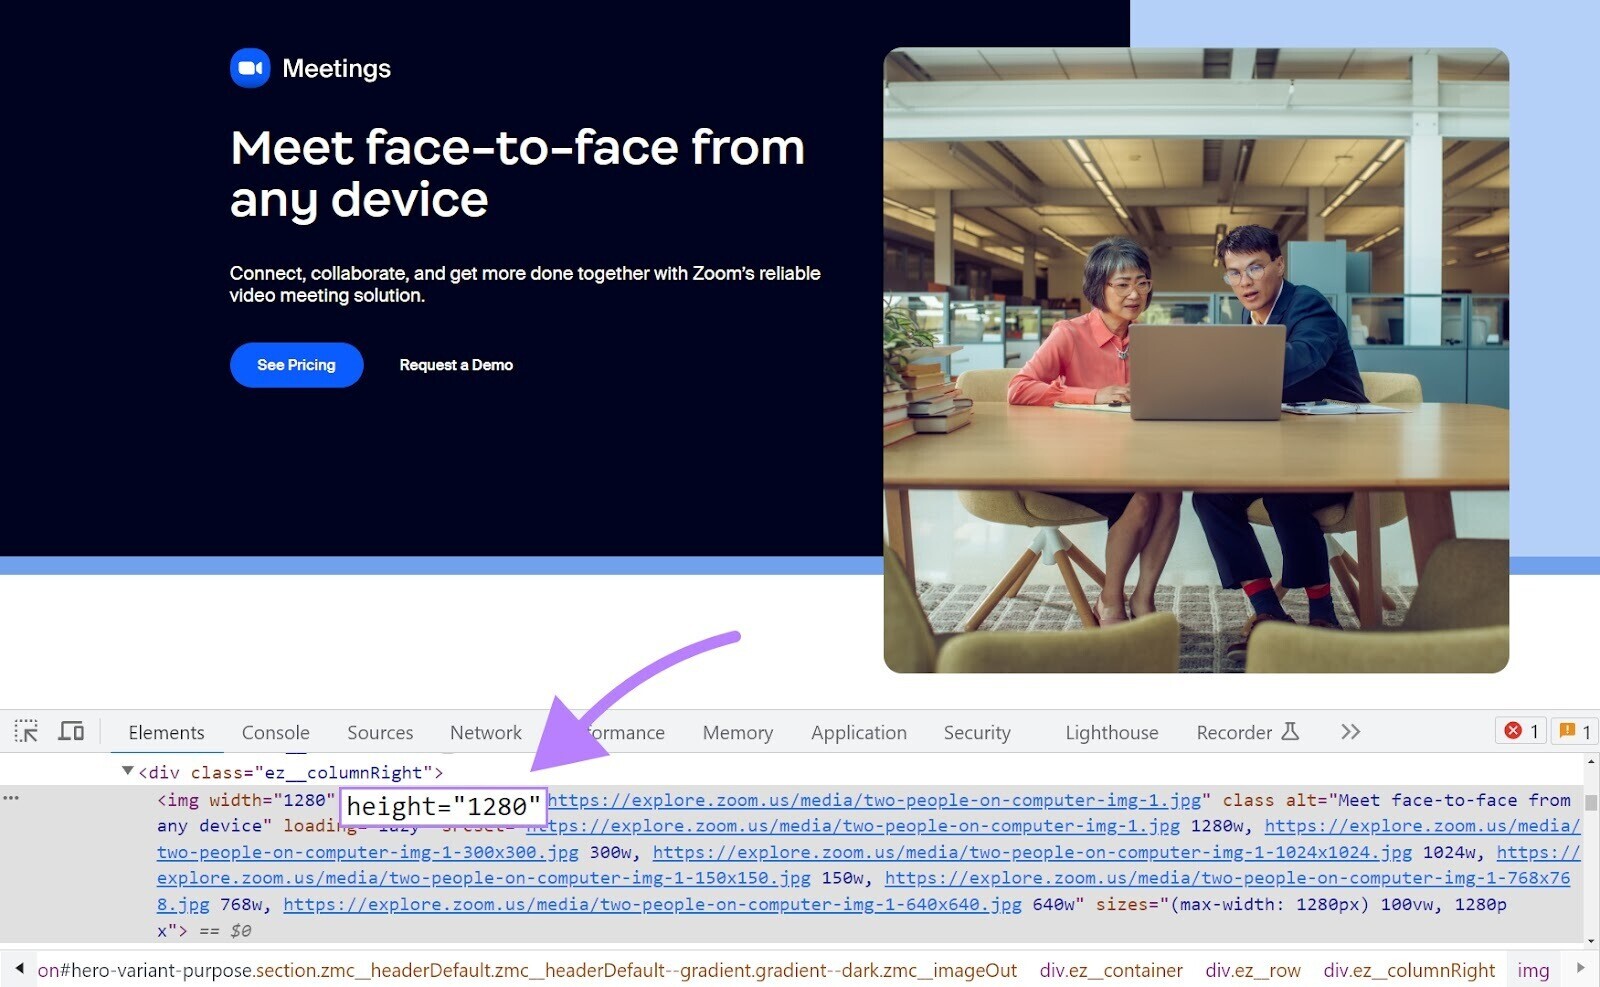
Not specifying the height will load the image in its original height. Which might now work with your page’s layout.
The Width Attribute
This attribute is used to specify the width of an image in pixels.
And an image without a width attribute will appear in its original width.
Tip: It’s recommended that you define both the height and width for images. To prevent the layout from changing after the image has loaded.
HTML Attributes That Are No Longer Recommended
Some old HTML image attributes were replaced in HTML5.
Browsers may support these attributes for compatibility, but it is not recommended to use them. They're deprecated (meaning not recommended).
Here’s the list of deprecated attributes:
- align
- border
- hspace
- longdesc
- name
- vspace
Browsers That Support the HTML Image Tag
The HTML <img> tag is a widely-accepted element.
It’s supported by all the popular internet browsers, including:
- Chrome
- Safari
- Edge
- Firefox
- Opera
Most mobile browsers also support the image tag.
Supported Image Formats to Use in Image Tags
Here’s the list of the popular image formats supported by Chrome, Edge, Firefox, Safari, and Opera:
- .apng
- .bmp
- .gif
- .jpeg
- .jpg
- .png
- .webp
- .svg
Best Practices for Ensuring Accessibility
Images make webpages visually appealing to readers.
But not everyone can see them well or at all. So, it’s also important to make them accessible to visually impaired people.
Remember, screen readers use images' alternative text to describe them. Meaning it's a good practice to write descriptive alt text for all non-decorative images.
But what are those?
Non-decorative images are the part of the page’s main content. And contain information you need to understand the page.
On the other hand, decorative image elements don’t contain any information. They enhance the webpage visually. So, keep the alternative text blank (alt=“”) for these elements so screen readers can skip them.
Here’s a good example of descriptive alt text: “Furry white cat sitting in front of a wall” is better than “Image of cat.”
Because the former text is more informative. It provides context about the image for people using screen readers.
Here are some best practices to make images more accessible:
- Use contextual and descriptive alt text
- Don’t add alternative text for decorative images like the one below

- For clickable images, describe the target links in the alternative texts of the images
- Avoid embedding important text that doesn’t appear anywhere else on the page inside images. If the image contains text, try to describe it in the alternative text.
- Write the alternative text in the same language as the rest of the page’s content
If the alternative text is left blank, some screen readers may default to the image’s file name. So, it’s important to use descriptive file names as well.
For example, the file name “furry-cat.png” is better than “image-202405.png.”
Google also sometimes uses file names to understand the images. That means a contextual image file name can also be beneficial for image SEO.
HTML Image Tag Examples
Now, let’s go over some specific examples using the image tag in HTML:
Image with Specific Dimensions
You can use the height and width attributes to specify an image’s dimensions.
Here’s an example of an image that’s 150x150 pixels:
<img src="https://example.com/cat.jpg" alt="Furry white cat sitting on a wall" height="150" width="150">Image with Inline Style
You can apply inline style to the image by using the style element.
Here’s an example of adding a black border to an image using inline style:
<img src="https://example.com/cat.jpg" alt="Furry white cat sitting on a wall" style="border:3px solid black">Animated Image
The <img> tag in HTML can display animated images like GIFs.
For example, the below tag displays a GIF:
<img src="https://example.com/rabbit.gif" alt="Rabbit jumping across the grass">Image as a Button
To use an image as a button, nest the <img> tag inside the <button> tag.
Like this:
<button type="submit"><img src="https://example.com/submit.jpg" alt="Submit the form"></button>Lazy Loading Image
You can enable lazy loading for an image by setting its loading attribute to “lazy.”
For example:
<img src="https://example.com/rabbit.gif" alt="Rabbit jumping across the grass" loading="lazy">Ensure Your Image Tags & Attributes Are Up to Code
HTML image tags let you embed images that make your pages appear visually rich. And image attributes can offer a better, more accessible user experience. And boost your rankings in search engines.
But you need to ensure they're used correctly.
Invalid HTML tags and attributes can cause technical issues. They can negatively affect the user experience and diminish your search engine rankings. Therefore, you should regularly audit your site to track such issues.
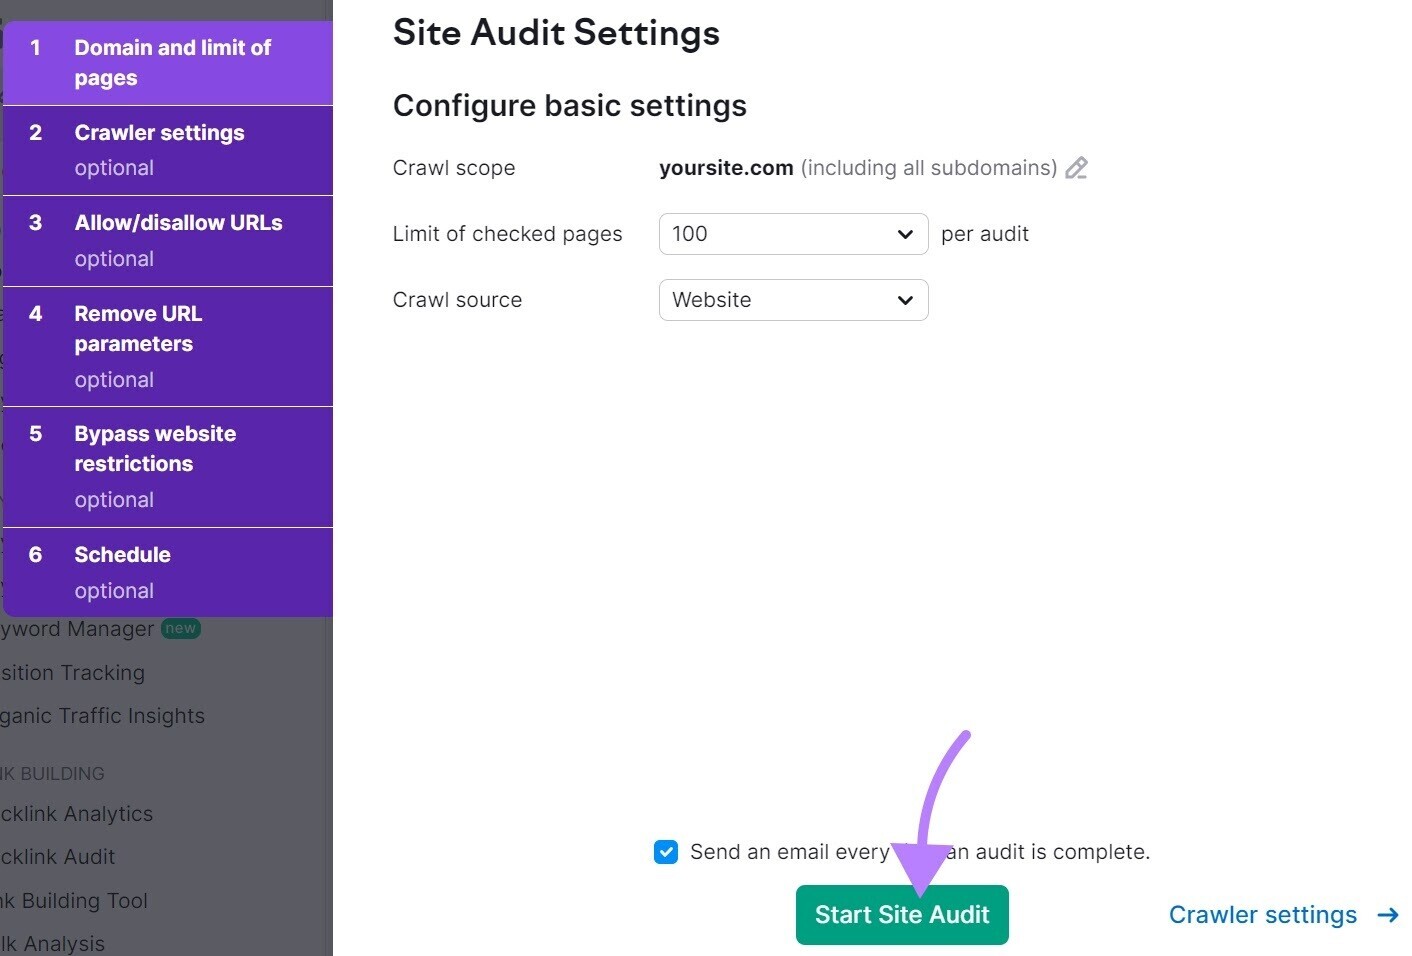
You can check for these types of issues using Site Audit
Open the tool and follow our configuration instructions. Then, click “Start Site Audit.”
Click the “Issues” tab. Then, enter “images” into the search bar to find issues like missing alt attributes.
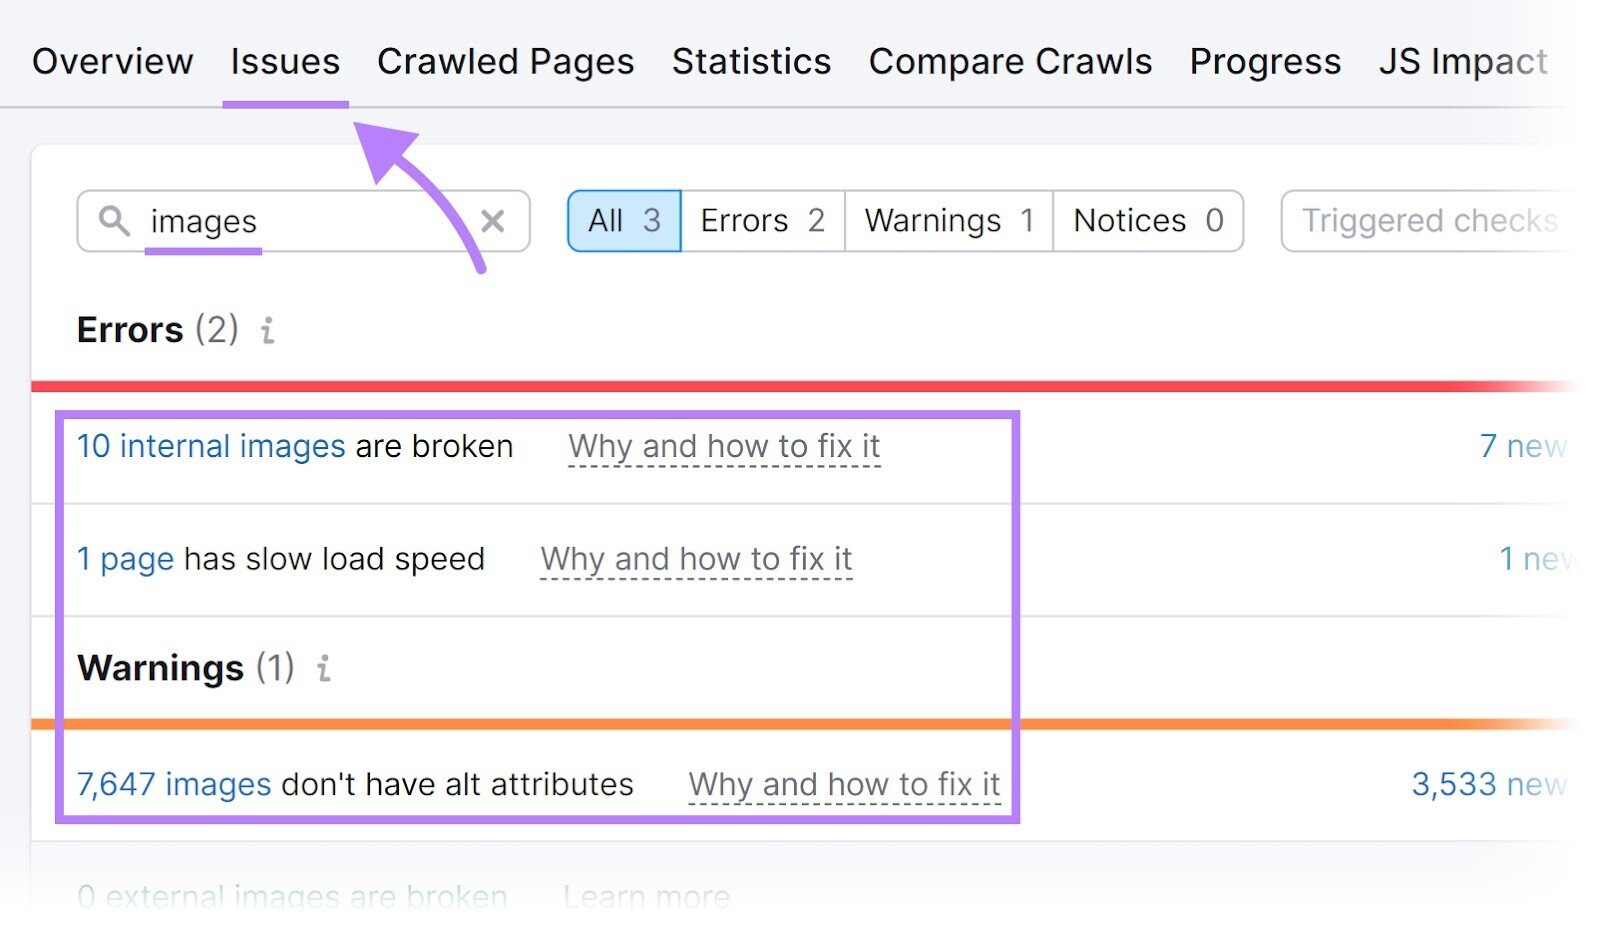
And you can find other technical issues with your site. The most urgent ones are called “Errors.”
You can also set a site audit schedule by clicking the gear icon and scrolling down to “Site Audit settings.”

Try Site Audit now for free.
