Semrush makes it easy to automate reporting for your team or stakeholders. You can schedule reports to be sent via email automatically, or get shareable links that give access to the live dashboards.
Let’s explore both the reporting options and how to set them up.
1. Schedule Automatic Email Reports
Set up automated email reports either directly from the specific Semrush tool or through the My Reports builder. Here’s how:
From the Specific Semrush Tool
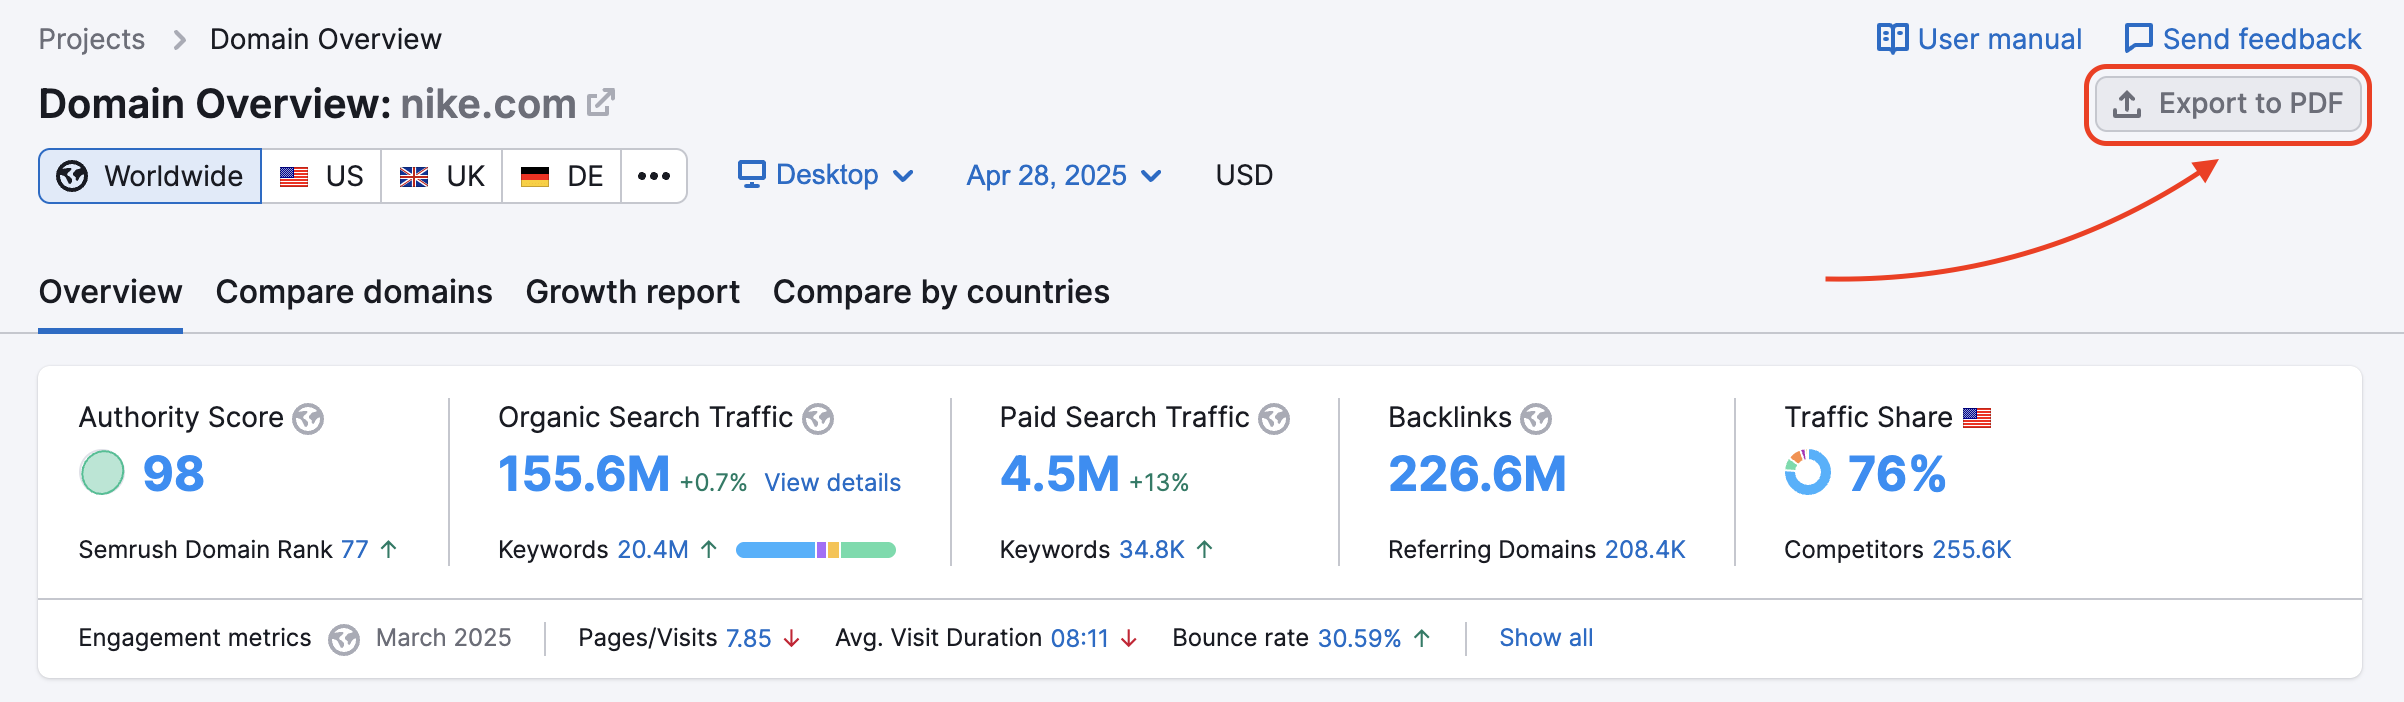
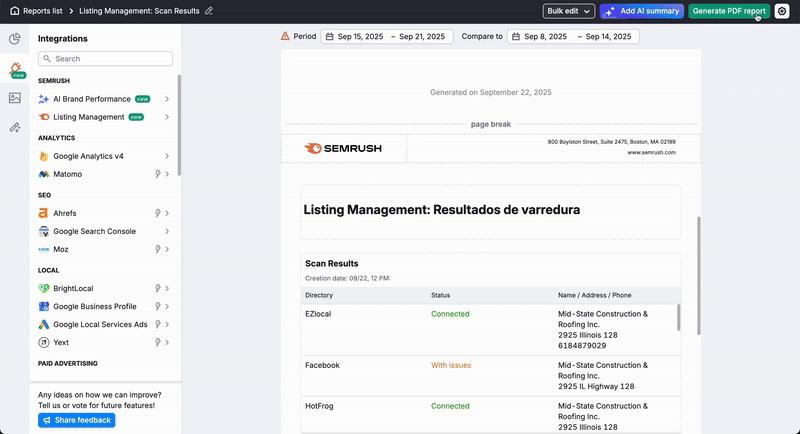
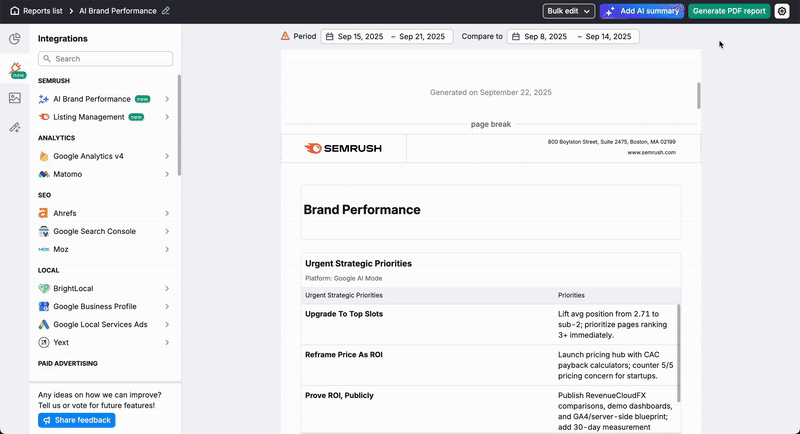
Open the tool whose data you want to send via email. This could be Domain Overview tool, Position Tracking, Organic Research, or any other Semrush tool that generates data you need regular updates on.
At the top right of your screen, click the “Export to PDF” button. Semrush will generate a ready-to-send PDF report.
A pop-up window will appear with several options. From here, enter the recipient email addresses where you want the report sent. If you want the report delivered regularly, toggle on the "Schedule report" option. Once enabled, you can set how often it should be sent (daily, weekly, or monthly) and choose the specific day for delivery.
Optionally, you can add an AI-generated summary to your report. Just toggle the “Add AI summary with auto updates” option. This creates a summary in your report that highlights key results, notable insights, and areas needing attention
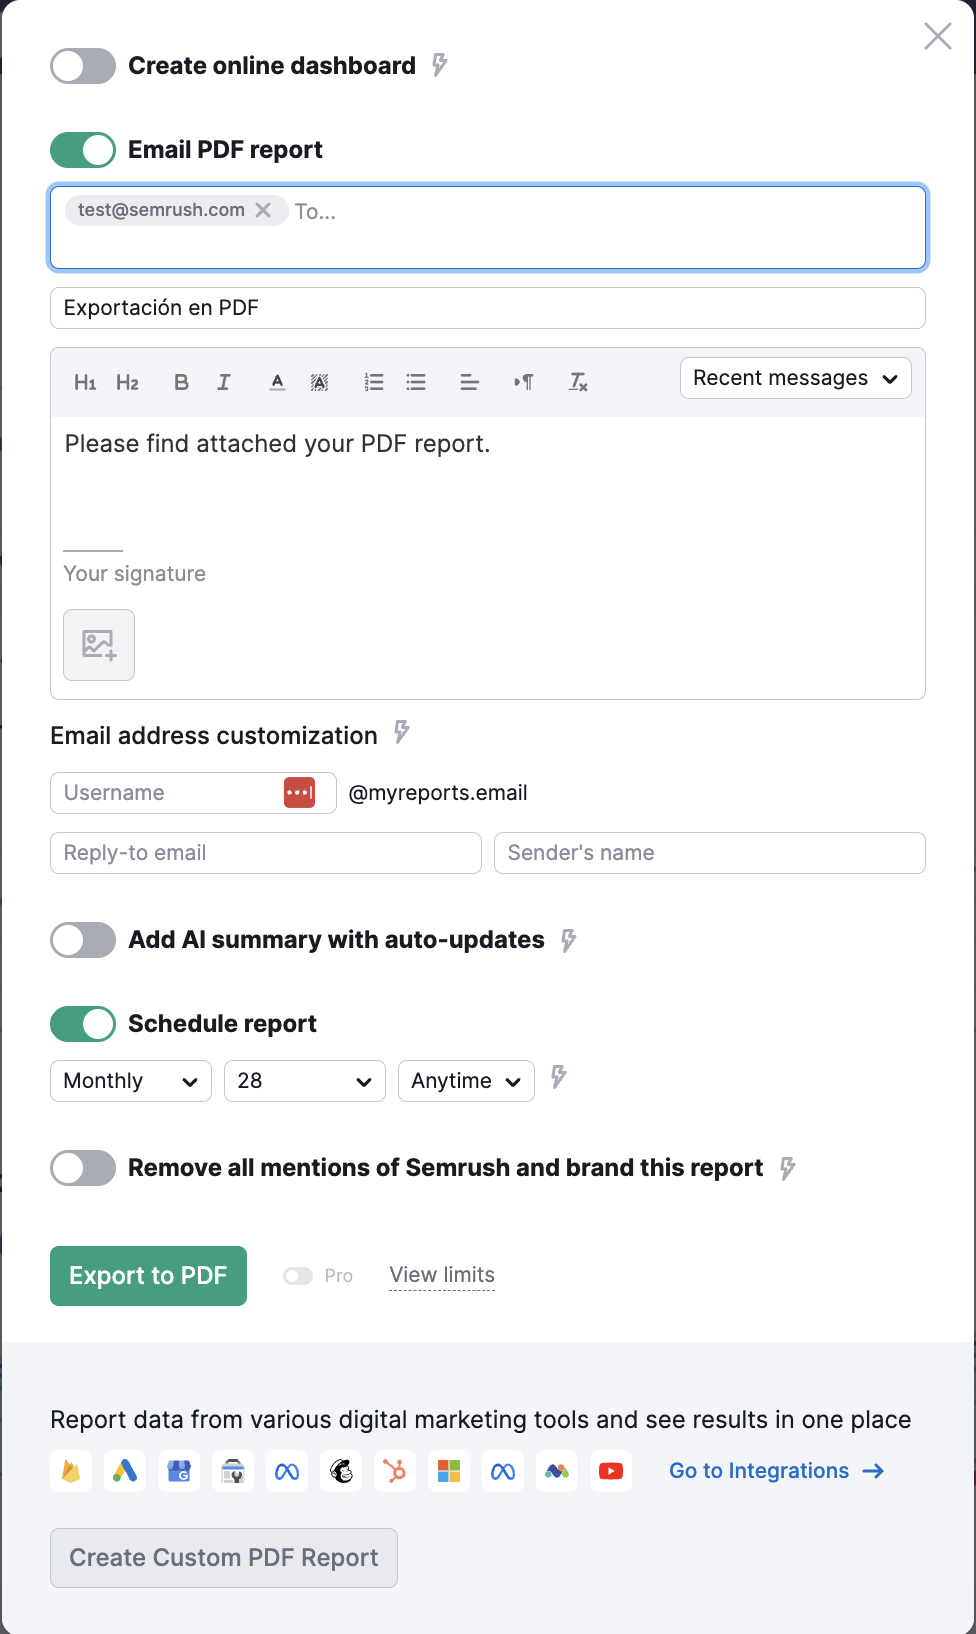
Once you've configured your settings, click "Export to PDF" to generate and schedule the report.
From the My Reports Tool
For more control over what data appears in your report, use the My Reports tool to build custom reports from scratch.
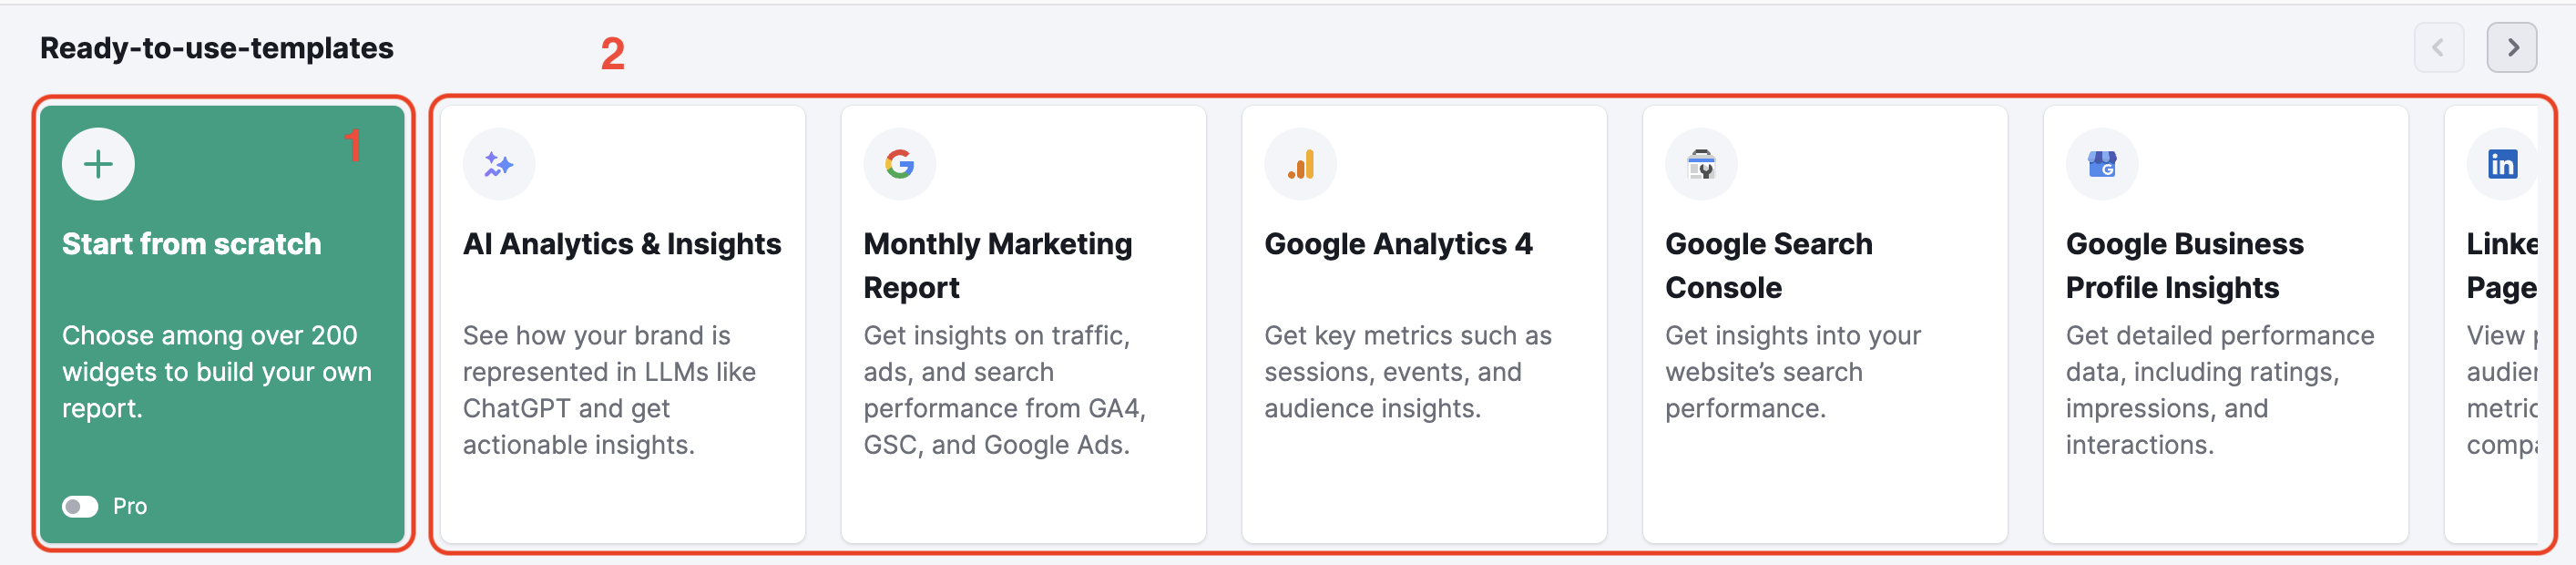
Navigate to the My Reports tool from the sidebar. You'll see two options:
- Start from scratch: Build a custom report using the drag-and-drop builder
- Use templates: Start with one of Semrush's pre-built templates and customize it to your needs
Let’s say you select option one. Even though you’re going to build the report from scratch, it’s going to be extremely easy. You just need to use a widget library. Each widget represents specific data—like keyword rankings from Position Tracking or backlink metrics from Backlink Analytics. Drag widgets onto your canvas and arrange them in the order that you like.
Once your report layout is ready, click "Generate PDF report" in the upper-right corner. A configuration window appears with several options.
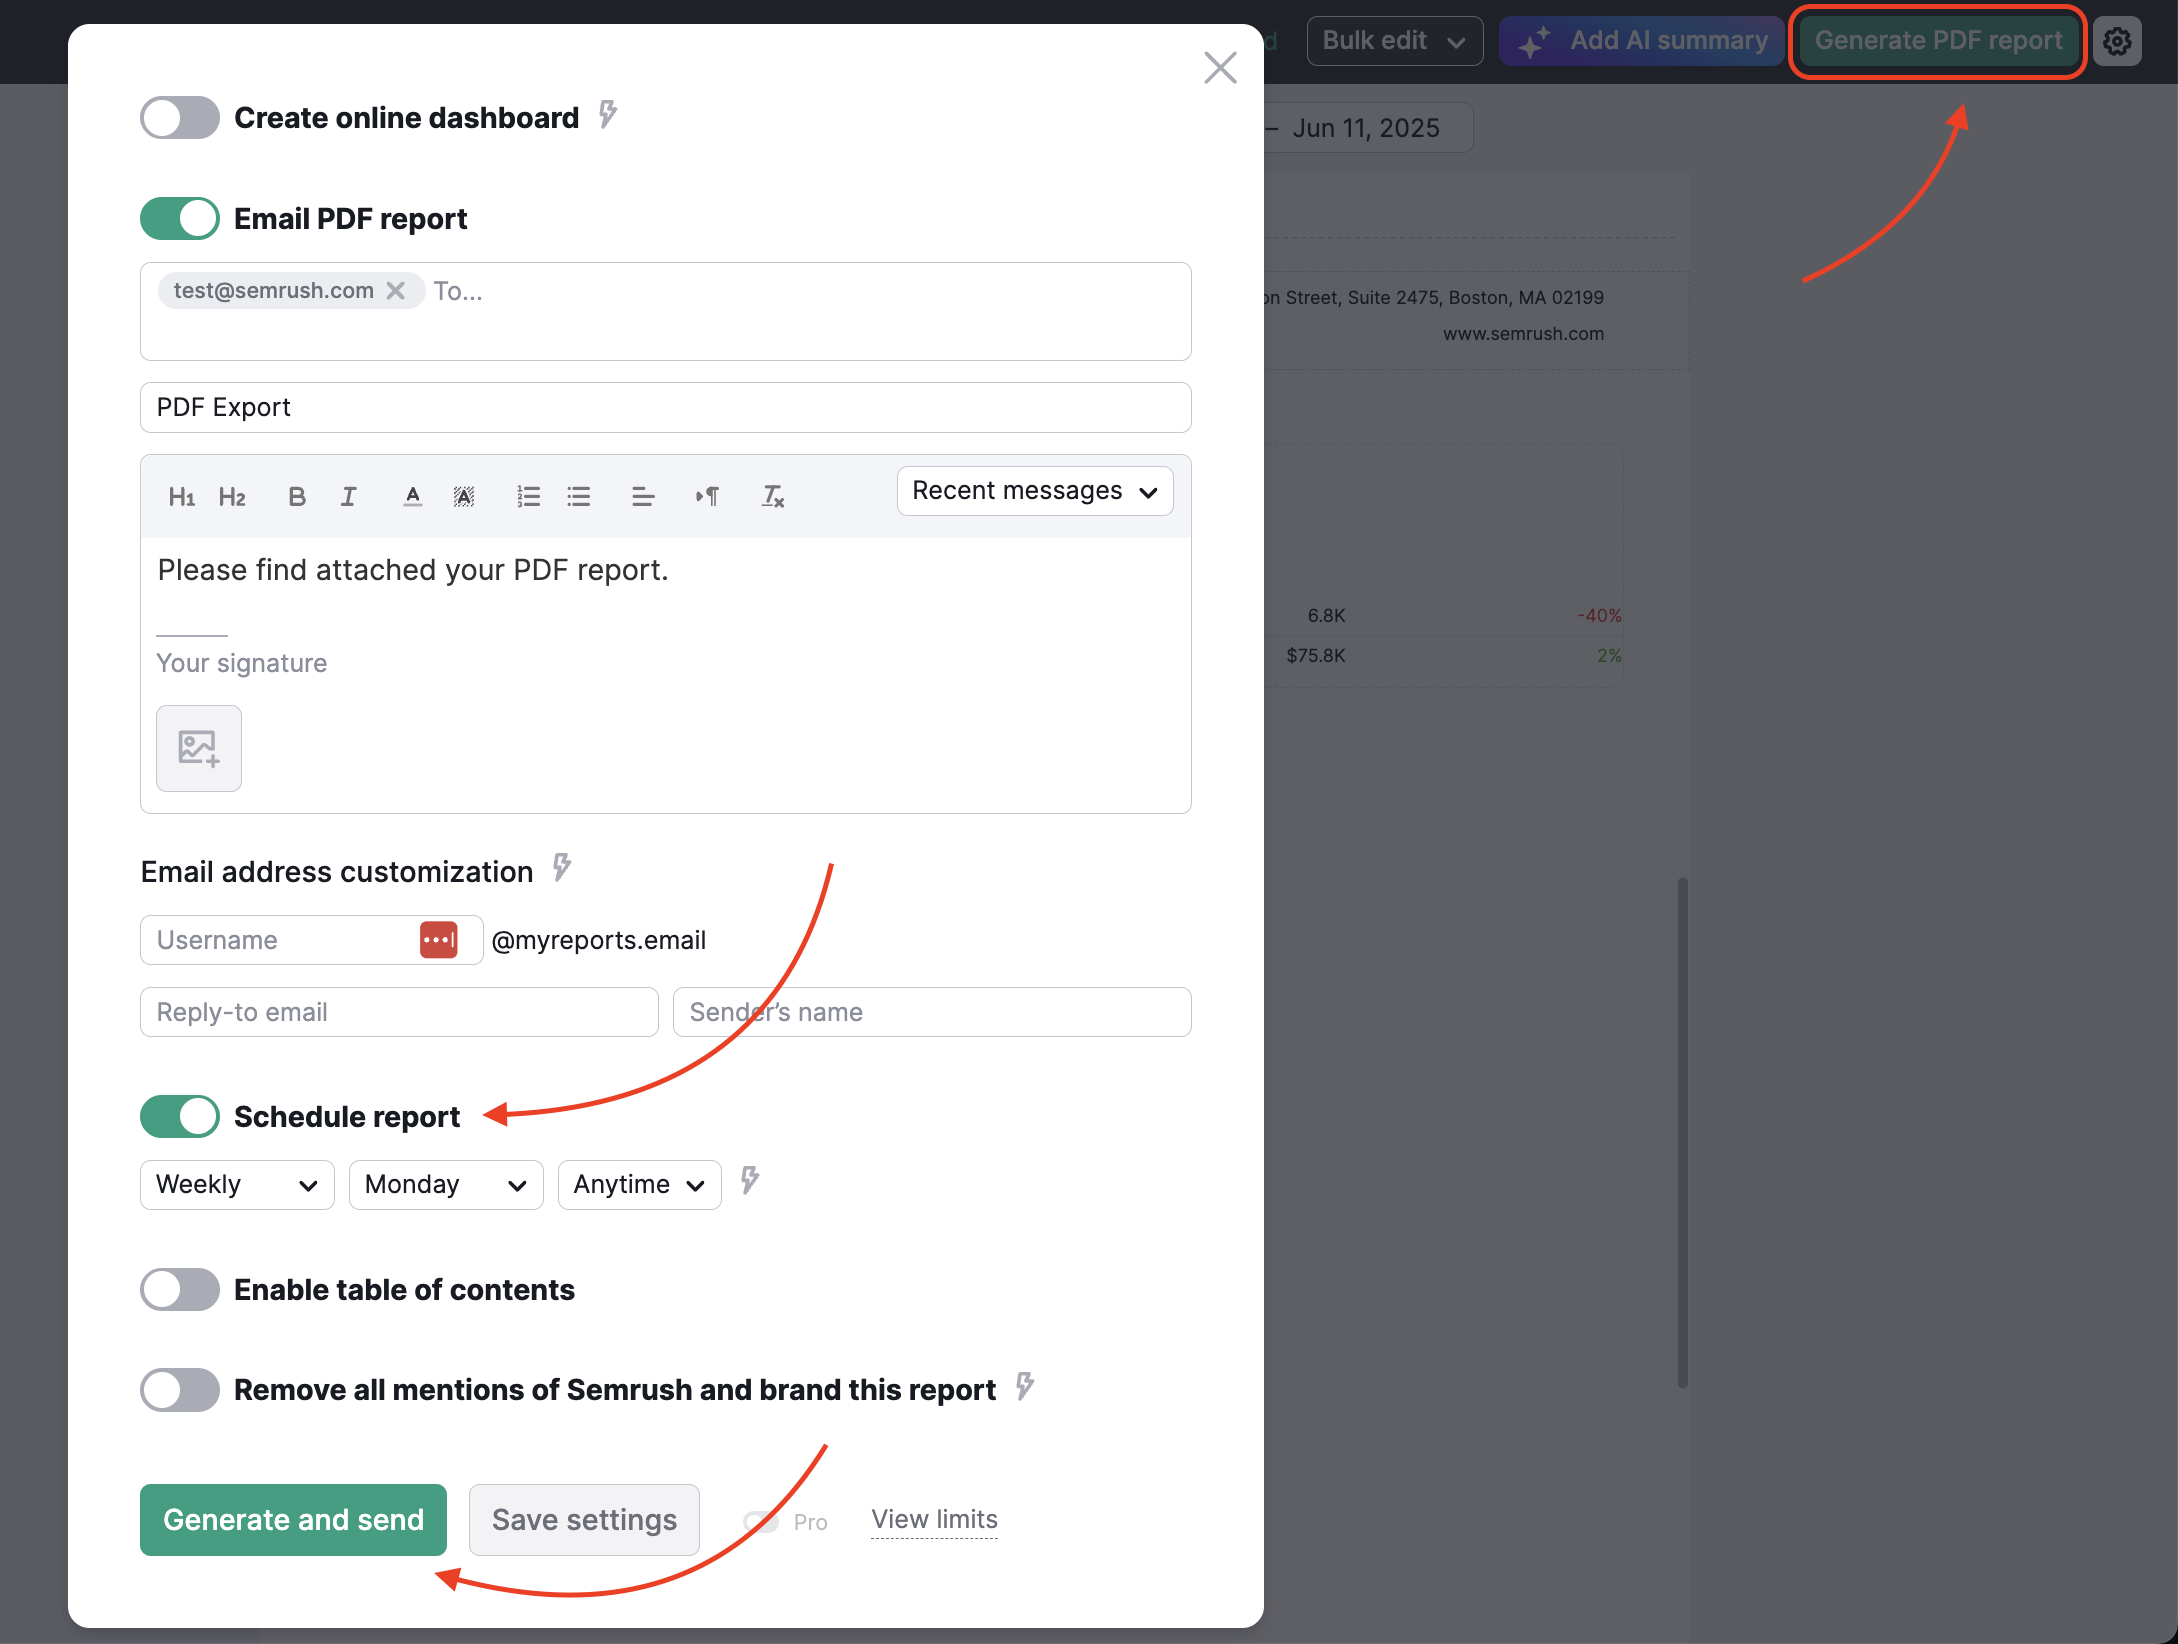
Enter the recipient email addresses where you want the report sent. Add an optional message that will appear in the email body alongside the report.
To set up recurring delivery, toggle on "Schedule report." Once enabled, select how often the report should be sent (daily, weekly, or monthly) and choose the specific day for automatic delivery.
Click "Generate and send" to send the report immediately and activate automated delivery, or click "Save settings" to schedule the report without sending right away.
2. Create Shareable Online Dashboards
Instead of sending PDF reports via email, you can create online dashboards. Anyone with the link can access the dashboard—no Semrush account needed.
Here’s how to create a dashboard:
Open the tool whose data you want to share as a dashboard. This could be Domain Overview, Position Tracking, Organic Research, or any other Semrush tool.
Click the "Export to PDF" button at the top right of your screen. In the pop-up window that appears, toggle on "Create online dashboard."
Configure any other settings you want (like AI summaries or white-labeling), then click “Export to PDF." Semrush generates your dashboard and displays a wizard with your shareable link.
Note: The ability to generate online dashboards is available with Pro subscription tier and higher.
Once your dashboard is generated, click the “Copy” button in the wizard that appears. Now, you can share this link with your clients.

In addition to sharing this link directly, you can embed the live dashboard into your client’s portal (if they prefer).
Follow the same steps to generate a dashboard. In the wizard that appears after creation, click the "Embed" button instead of "Copy."
Semrush displays the HTML iframe code needed to embed the dashboard. Click "Copy" to copy the code to your clipboard.
Share this code with your client's development team so they can integrate it into the right portal (website).
You don't need to add this code immediately after creating the dashboard. You can always come back later to access the embed code whenever you're ready.
Navigate to the My Reports tool and locate your dashboard in the list. Click the "Copy link" button next to it to open a wizard with both sharing and embedding options.

Dashboard data updates automatically based on your settings. If you’ve selected weekly updates, the dashboard updates weekly with fresh data—no need to do anything manually.
